How to Grow Sunflower Microgreens: Soak, Sow, Harvest
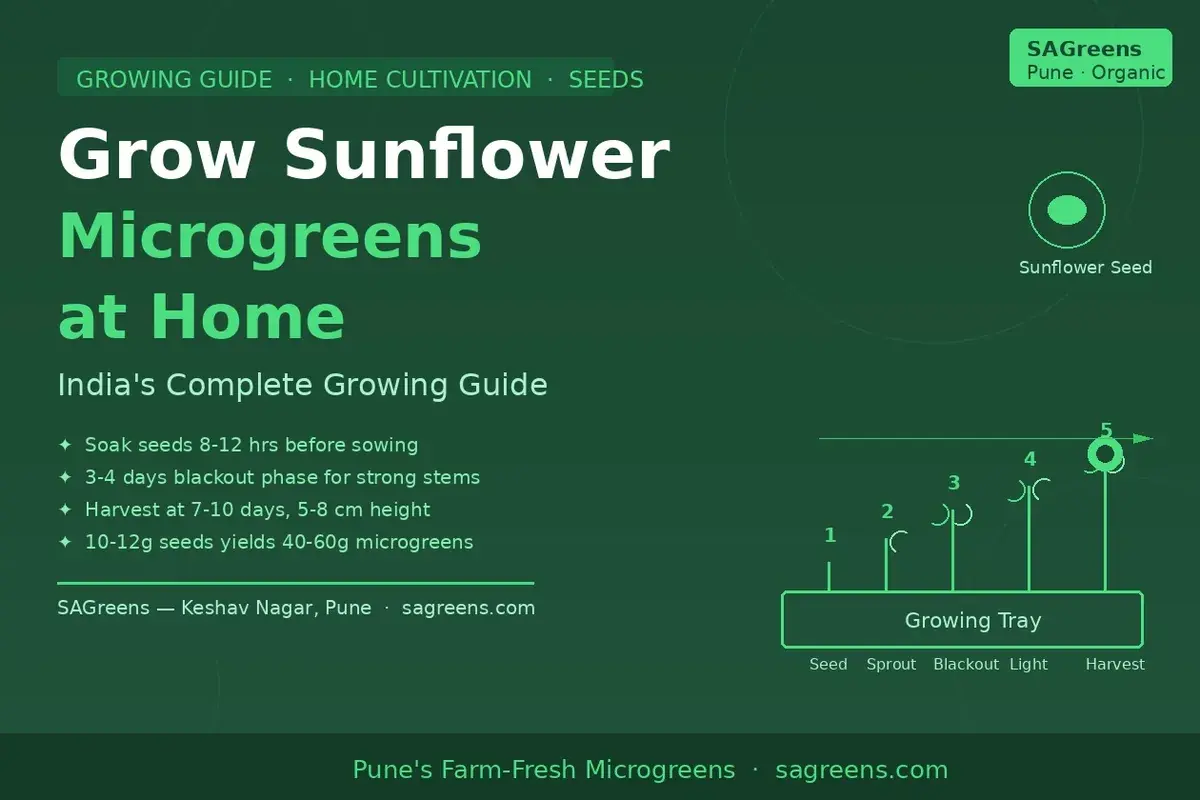
How to Grow Sunflower Microgreens at Home
Sunflower microgreens are among the most rewarding crops for home growers — fast, forgiving, nutritionally exceptional, and flavourful enough to eat as a snack straight from the tray. With their thick, crunchy stems, nutty taste, and bright yellow seed leaves, they are the microgreen that converts the most sceptics into enthusiasts on the first bite.
Key Takeaways: Sunflower microgreens are ready in 8-12 days from sowing. Use black oil sunflower seeds (not striped variety). Soak seeds for 8-12 hours before sowing. Use a 4-5 day blackout phase with weight on top to straighten stems. Harvest at 8-10 cm when seed leaves are fully open. India-specific tip: during monsoon, reduce watering frequency and ensure excellent air circulation to prevent mould. One 30×20cm tray yields approximately 100-150g.
This guide covers every stage of the sunflower microgreen growing process — seed selection, equipment, sowing, blackout phase, light phase, harvest, and storage — with specific advice for Indian home growing conditions across different seasons.
Why Sunflower Microgreens Are the Best Beginner Crop
Sunflower microgreens have several properties that make them ideal for first-time home growers:
Large seeds: Unlike tiny broccoli or mustard seeds that require precise, even scattering, sunflower seeds are large enough to place and see easily. Mistakes are visible and correctable before germination.
Vigorous germination: Black oil sunflower seeds germinate at 90-95% rate under almost any reasonable conditions. You do not need precise temperature control or humidity management — they grow.
Fast and forgiving: 8-12 days total from sowing to harvest. If you underwater slightly, they recover. If you slightly overwater, they forgive. The thick cotyledons store enough energy to survive minor errors.
Striking visual signal: The bright yellow-green seed leaves are unmistakable when ready — no guessing about maturity. The seed hull lifting off as the leaves open is satisfying and visible.
Nutritional completeness: Sunflower microgreens are among the highest in protein (3.0-3.8g per 100g), vitamin E (32% DV), zinc, and B vitamins of any common microgreen. You are growing one of the most nutritionally complete plant foods available.
For Indian home growers, sunflower microgreens also have a practical advantage: they grow well in the 18-32°C temperature range that covers most of India's non-peak-summer months, and they recover from the temperature variability typical of Indian apartments.
Choosing Seeds: Black Oil vs Striped Sunflower Seeds
The most common beginner mistake with sunflower microgreens is buying the wrong seeds. There are two types of sunflower seeds sold in India:
Black oil sunflower seeds (correct): Small, fully black seeds. These are the variety bred for high oil content and thin shells. They are used for birdseed and oil production. For microgreens, they germinate faster (24-36 hours), produce higher yields, and have thinner hulls that shed more easily. SAGreens sells certified black oil sunflower seeds tested for 90%+ germination rate.
Striped sunflower seeds (incorrect): The large, striped seeds sold as snacks and for cooking. These are bred for the edible kernel, not germination rate. They have thicker shells, lower germination rates, and take 2-3 days longer to germinate. Using striped seeds results in uneven, slow germination and higher mould risk during the extended blackout phase.
Treated vs untreated: Seeds sold for agricultural planting are often coated with fungicides. Never use treated seeds for microgreens — the coating is toxic. Use only food-grade or microgreen-specific seeds. The SAGreens organic sunflower seeds are untreated and tested for microgreen germination specifically.
Equipment You Need
| Equipment | Specification | Indian Alternative |
|---|---|---|
| Growing tray | 30×20cm with drainage holes | Any plastic food container with holes punched in base |
| Second tray (no holes) | 30×20cm base tray to catch drainage | A second container or plate |
| Growing medium | Cocopeat (coir), 2-3 cm depth | Sterilised soil works but risks mould |
| Weight for blackout | Heavy book or flat stone (~1-2 kg) | Anything flat and heavy |
| Spray bottle | For watering | Any small spray bottle |
| Light source | 4-6 hours direct morning sun | South or east facing balcony |
Cocopeat (coconut coir) is strongly recommended over soil for Indian home growing conditions. It retains moisture without waterlogging, has excellent drainage, is sterile (reducing mould and fungus risk), and is neutral pH. Cocopeat blocks are widely available at nurseries across India — one block (weighing ~5 kg) expands to fill 25-30 trays and costs ₹150-200.
Step-by-Step Growing Guide
Step 1 — Soak Seeds (8-12 hours)
Measure 2-3 tablespoons of organic black oil sunflower seeds per 30×20cm tray. Not sure which seeds to buy? Read our microgreen seeds buyer's guide for germination rates, storage tips and how to spot quality seeds. Place seeds in a bowl and cover with clean water. Soak for 8-12 hours (overnight soaking is ideal — start in the evening). Do not soak longer than 16 hours — seeds begin to ferment and germination rate drops.
After soaking, drain and rinse with fresh water. The seeds will have visibly swollen — you may see the first hints of a root tip emerging from some seeds. For complete soaking guidance covering all seed varieties including which seeds to never soak, read our microgreen seeds soaking guide India.
India-specific tip: During monsoon months (June-September), use cooled boiled water or filtered water for soaking to reduce the risk of introducing bacteria or mould spores that thrive in high-humidity conditions.
Step 2 — Prepare the Tray and Sow
Fill your growing tray to 2-3 cm depth with moist cocopeat (not wet — cocopeat should feel like a wrung-out sponge, not dripping). Level it flat.
Spread the soaked seeds evenly across the surface, one layer deep. Seeds should touch but not overlap significantly — slight overlapping is fine for sunflower microgreens. This tighter sowing is intentional: the weight pressing from above during the blackout phase helps seeds shed their hulls and forces stems straight.
After spreading seeds, use your palm to gently press them into the cocopeat surface — they should make light contact with the medium. Mist the seeds lightly with a spray bottle.
Step 3 — Blackout Phase (Days 1-4)
Place a second tray on top of the seed tray (or a sheet of cardboard) and add a heavy, flat weight on top — a large book, a filled water bottle, a brick. This serves two purposes: it creates darkness for the germination phase, and the pressure helps the emerging shoots push off their seed hulls.
Place the weighted tray in a corner, out of direct light. Check once daily (lift the blackout cover briefly):
- Day 1-2: Seeds germinating, small white roots visible
- Day 3: Pale yellow shoots 2-4 cm tall, pressing against the cover
- Day 4: Shoots are vigorous, 4-6 cm, with most seed hulls still attached — ready to move to light
Do not mist during the blackout phase unless the cocopeat surface appears dry. The moisture from sowing and the residual moisture in soaked seeds is usually sufficient for Days 1-4.
Blackout Tip: The weight is critical for sunflower microgreens specifically. Unlike other microgreens that grow fine without pressure, sunflower stems that grow upward without weight tend to flop sideways and have messy, attached hulls. The mechanical resistance of the weight trains them to grow straight and forces the hull off the seed leaves.
Step 4 — Light Phase (Days 5-9)
Remove the weight and blackout cover. Move the tray to a location with 4-6 hours of indirect or direct morning sun. South-facing or east-facing balconies in Indian apartments are ideal. Avoid harsh afternoon sun (11am-3pm) which can cause heat stress and wilting in summer months.
Watering during light phase: Water from below (add water to the base tray and let the cocopeat absorb) or mist gently from above once or twice daily depending on how quickly the medium dries. The cocopeat should remain consistently moist but never waterlogged. In dry winter months, twice-daily misting is typical. In humid monsoon months, once-daily or every-other-day may be sufficient.
Hull removal: By Day 5-6, most seed hulls will have fallen off or loosened. Hulls that remain attached after Day 6 can be gently misted — moisture helps them loosen. Do not force hulls off manually; this can damage the delicate seed leaves.
During Days 5-9, watch the shoots green up — the pale yellow cotyledons will turn bright yellow-green as chlorophyll develops in response to light exposure. This greening process also activates the antioxidant compounds that make sunflower microgreens nutritionally valuable.
Step 5 — Harvest (Days 8-12)
Sunflower microgreens are ready when:
- Height: 8-10 cm (measuring from base to tip of seed leaves)
- Colour: Bright yellow-green seed leaves, fully open
- Texture: Firm, upright stems — not floppy or limp
Harvest with clean scissors or a sharp knife, cutting just above the cocopeat surface. A single 30×20cm tray typically yields 100-150g of microgreens when sown at the recommended density with black oil seeds.
After harvesting, rinse gently under cold water and spin dry (or pat dry with a clean towel). Wet microgreens left unbrushed after harvest deteriorate faster.
Regrowth: Unlike pea shoots, sunflower microgreens do not regrow after harvest — the plant's energy is entirely in the one-time cotyledon harvest. Compost the root mat after harvesting (excellent nitrogen-rich composting material) and start a new tray.
Seasonal Growing Guide for India
| Season | Temperature Range | Key Adjustments |
|---|---|---|
| Summer (Mar-May) | 30-40°C | Move trays indoors after 9am; water twice daily; avoid direct sun during 10am-4pm; germination faster (6-8 days) |
| Monsoon (Jun-Sep) | 24-32°C | Use filtered water; reduce watering; maximise air circulation; harvest slightly early to prevent mould |
| Post-monsoon (Oct-Nov) | 20-28°C | Ideal conditions; standard protocol; excellent germination |
| Winter (Dec-Feb) | 14-24°C | Best growing conditions; may take 10-12 days instead of 8-10; germination slightly slower but quality excellent |
Monsoon mould prevention is the primary challenge for Indian home growers. Sunflower microgreens in high humidity (above 85% RH) can develop white fuzzy mould on stems — this is usually Rhizopus or Botrytis. Prevention measures:
- Always soak seeds overnight; skip soaking in very humid conditions (above 90% RH)
- Use cocopeat rather than soil
- Ensure active air circulation (a small fan on low is effective)
- Harvest on the early side (Day 8 rather than Day 10)
- Do not cover the top of the tray with plastic during the monsoon
Common Problems and Solutions
| Problem | Likely Cause | Solution |
|---|---|---|
| Yellow, pale shoots after Day 5 | Insufficient light | Move to brighter location; minimum 4 hours indirect sun |
| Stems flopping sideways | Insufficient weight during blackout | Use heavier weight; 1-2 kg minimum on top |
| Seed hulls not shedding | Insufficient humidity, low pressure | Mist more during light phase; extend blackout 1 day with more weight |
| White fuzzy mould on stems | Overwatering + poor air circulation | Reduce watering frequency; add fan; harvest immediately and consume |
| Uneven germination | Uneven sowing or old seeds | Ensure even seed distribution; use fresher seeds with verified germination rate |
| Bitter taste | Harvested too late (past Day 12) | Harvest at 8-10 cm before seed leaves age; bitterness indicates maturity overshoot |
| Stunted growth | Temperature too low (<15°C) | Move indoors to a warmer location; growth resumes above 18°C |
Nutritional Benefits of Sunflower Microgreens
Growing your own sunflower microgreens gives you access to one of the most nutritionally complete plant foods available:
| Nutrient | Per 100g | % Daily Value | Benefit |
|---|---|---|---|
| Vitamin E | ~9.5 mg | 32% DV | Skin antioxidant, immune function |
| Zinc | ~0.8 mg | ~8% DV | Immune support, testosterone, wound healing |
| Protein | 3.0-3.8 g | — | Satiety, muscle maintenance |
| Vitamin B1 (Thiamine) | ~0.4 mg | ~33% DV | Energy metabolism |
| Magnesium | ~21 mg | ~5% DV | Blood sugar, muscle, nerve function |
| Dietary Fibre | 2.4 g | ~9% DV | Gut health, satiety |
| Folate | ~48 mcg | ~12% DV | Cell division, pregnancy health |
The same-morning harvest advantage of SAGreens delivery — or home growing — is particularly relevant for vitamin E and folate, both of which degrade significantly during cold-chain transport and storage. Fresh-cut sunflower microgreens contain up to 40% more folate than those stored for 5+ days at supermarket temperatures.
Buying Seeds vs Growing at Home: Cost Comparison
| Metric | Buying from SAGreens | Growing at Home |
|---|---|---|
| Cost per 100g | ₹120-150 | ₹18-25 (seed + cocopeat, amortised) |
| Time investment | 0 minutes | 15-20 min/tray (soaking, sowing, harvest) |
| Quality consistency | Same-morning harvest | Depends on growing conditions |
| Shelf life at delivery | 6-10 days | Harvest immediately before eating |
Growing at home achieves maximum nutritional freshness — you eat within hours of harvest. But it requires time, setup, and consistent attention. Many SAGreens customers do both: grow one or two trays at home for daily snacking and order packs for reliable, large-batch supply.
For seed purchase, use SAGreens organic sunflower seeds — tested at 90%+ germination rate, untreated, and selected for microgreen growing (not field cultivation where germination rate is less critical). For a complete buying guide including how to choose between black oil and confectionery varieties, see our organic sunflower seeds for microgreens India guide.
Seed Quality & Pricing: All SAGreens microgreen seeds are NPOP-certified organic — untreated, non-GMO, germination tested before dispatch. Seeds start at ₹50/100g (wheatgrass), ₹124/100g (sunflower, mustard) and ₹139/100g (radish). Delivery charged at checkout, by city and weight. Browse microgreen seeds or contact us for bulk pricing.
Frequently Asked Questions
How much water do sunflower microgreens need daily?
During the light phase, mist 1-2 times daily depending on how quickly your medium dries. In humid monsoon months, once daily or every other day may be enough. The cocopeat should feel like a wrung-out sponge — moist but not wet. Overwatering is the most common cause of mould.
Can I reuse the cocopeat after harvest?
You can reuse cocopeat 1-2 times after sterilising it (spread in sunlight for 2-3 days in summer, or microwave damp cocopeat for 2 minutes). However, fresh cocopeat is inexpensive enough that starting fresh each tray is preferred for disease prevention.
Why are my sunflower microgreens bitter?
Harvested too late. Sunflower microgreens develop bitterness as they age past their optimal harvest window (8-10 cm, 8-12 days). They also develop a stronger taste if first true leaves begin to emerge. Harvest promptly when seed leaves are fully open.
How many trays should I grow at once to have a daily supply?
Stagger 2-3 trays 3-4 days apart. With an 8-12 day growing cycle, 3 trays started 3-4 days apart gives you one tray ready every 3-4 days — sufficient for a family of 2-3 eating 50-80g per day.
Can I grow sunflower microgreens indoors without sunlight?
Yes, with a grow light. A basic LED grow light (40W-60W, full spectrum) positioned 10-15 cm above the tray for 14-16 hours daily is sufficient. Avoid leaving lights on 24 hours — microgreens, like all plants, benefit from a dark rest period. Sunflower microgreens under grow lights may be slightly paler than sun-grown but are nutritionally comparable.
What is the best soil for sunflower microgreens in India?
Cocopeat is strongly preferred over soil for Indian conditions. Soil can introduce fungal pathogens, pests, and weed seeds; it also compacts during watering, reducing oxygen availability to roots. If soil is the only option, use sterilised potting mix and add perlite (20%) for drainage. See our cocopeat growing guide for a detailed comparison.
Do sunflower microgreens grow back after cutting?
No — sunflower microgreens are a one-time harvest crop. Unlike pea shoots, which regrow 2-3 times after cutting, sunflower microgreens put all their energy into the first cotyledon growth. After harvest, compost the root mat and start a new tray.
How do I get the seed hulls off cleanly?
The main techniques: (1) use adequate weight during blackout — this is the most effective hull-removal mechanism; (2) mist the hulls with water after moving to light and let them loosen naturally; (3) do not force them manually. If a few stubborn hulls remain, they are harmless to eat — the seed is inside and perfectly edible.
Are sunflower microgreens safe for children?
Yes, they are one of the best microgreens for children — mild, nutty flavour that most children enjoy, no strong bitterness or pungency. The high vitamin E and zinc content is particularly beneficial for growing children. Many parents blend them into smoothies or use them in wraps.
What seeds can I mix with sunflower microgreens in the same tray?
Sunflower microgreens have a specific growing cycle and blackout requirement that differs from most other species. Growing them in a mixed tray usually results in uneven germination and harvest times. Grow sunflower separately and mix at harvest time with pea shoots or radish microgreens for a nutritionally balanced mix.
Can I reuse cocopeat after harvesting sunflower microgreens?
You can reuse cocopeat 1-2 times after sterilising it in sunlight for 2-3 days. However, fresh cocopeat is inexpensive enough that starting fresh each tray is preferred for disease prevention, especially during monsoon.
How many trays for a daily supply of sunflower microgreens?
Stagger 2-3 trays 3-4 days apart. With an 8-12 day growing cycle, 3 trays started 3-4 days apart gives one tray ready every 3-4 days — sufficient for a family of 2-3 eating 50-80g daily.
How do I get sunflower microgreen seed hulls off cleanly?
Use adequate weight during blackout (1-2 kg flat weight) — this is the most effective hull-removal mechanism. After moving to light, mist the hulls with water and let them loosen naturally. Do not force them manually; a few remaining hulls are harmless to eat.
Conclusion
Sunflower microgreens are the ideal first microgreen for any Indian home grower. They are fast, forgiving, visually satisfying, and nutritionally outstanding. The 8-12 day growing cycle means you see results quickly enough to stay motivated, and the flavour reward — nutty, crunchy, satisfying — makes them a genuine food enjoyment rather than a nutritional duty.
The key success factors for Indian conditions: black oil seeds (not striped), adequate soaking (8-12 hours), a heavy blackout weight, morning sun or grow light, and careful water management during monsoon months.
For seeds with guaranteed high germination rates, browse SAGreens organic sunflower seeds. For fresh-grown sunflower microgreens delivered same-morning across Pune, order from SAGreens. For a guide to growing the other most popular home microgreen, see our pea shoot growing guide.
First Tray Success Formula: Black oil seeds + 8-hour soak + 2cm cocopeat + heavy blackout weight (1-2 kg) + morning sun (4-6 hours) = sunflower microgreens in 8-10 days. Everything else is refinement. Most failures trace to one of three causes: wrong seed type (striped instead of black oil), insufficient blackout weight (stems flop sideways and hulls don't shed), or overwatering during monsoon (triggers Rhizopus mould). Fix the fundamentals and the rest follows.
Sunflower microgreens pair beautifully with Indian cooking: fold into raita for a nutty twist, top your moong dal khichdi, scatter over upma as a protein boost, or add to thali meals for a fresh crunch. Their mild, nutty flavour complements sabzi and dal alike.
*This guide is written by the SAGreens team, led by Ajay Toradmal — a three-generation farming family from Pune, Maharashtra. Ajay has grown thousands of sunflower microgreen trays across all seasons and Indian climate conditions. Contact SAGreens for seeds, cocopeat, and growing guidance.*
More Microgreens Tips & Recipes
How to Grow Pea Shoot Microgreens at Home
Step-by-step guide to growing pea shoot microgreens at home. Soak, sow, blackout, harvest in 10-14 days. Sweet flavour, rich in vitamin K and protein.
How to Grow Radish Microgreens at Home in 5-7 Days
Grow radish microgreens at home in 5 to 7 days. Step-by-step India guide covering seed, cocopeat, the blackout phase, monsoon tips and harvest.
Microgreens Kerala Growing Guide | Tropical Climate Tips
Complete guide to growing microgreens in Kerala's tropical climate. Best varieties for humidity, monsoon tips, seed sourcing. Kochi delivery.
Fresh Tips & Exclusive Offers
Subscribe for growing tips, seasonal updates, and exclusive offers on fresh organic microgreens in Pune.