How to Grow Radish Microgreens at Home India
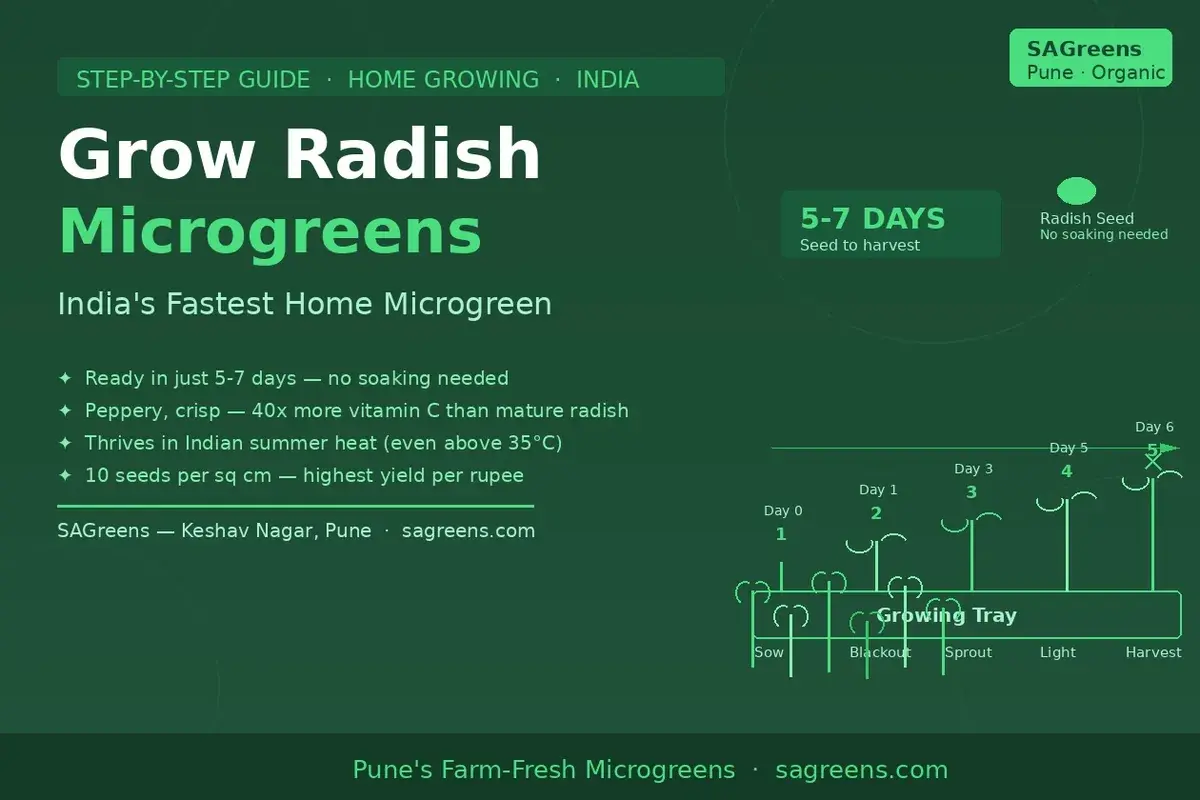
Radish microgreens are the fastest and most forgiving microgreen you can grow in India. From sowing seed to harvest takes just 5-7 days — no soaking required, no special equipment, and no experience needed. If you have ever wanted to grow your own fresh greens at home but worried about complexity or failure, radish is the place to start. For the seed side specifically — which lot to buy, how much per tray, and why the stems colour when they do — see our red radish microgreen seed guide. SAGreens has grown thousands of radish trays across all four Indian seasons, and the failure rate for anyone who follows the steps in this guide is close to zero.
Key Takeaways: Radish microgreens are ready in 5-7 days, germinate at 95-97% with zero soaking, and thrive in Indian heat above 35°C where most other varieties struggle. Use organic food-grade radish seeds at 15-20g per standard tray. Two days of blackout phase is sufficient. Harvest when cotyledons are fully open and before the first true leaves emerge. Radish microgreens contain 40x more vitamin C than mature radish and 29mg of glucoraphasatin per 100g — one of the highest sulforaphane precursor concentrations of any common microgreen.
You will need: a shallow tray (30x20cm or any flat container), cocopeat (or potting mix), organic radish seeds, a spray bottle, and something flat and heavy for the blackout cover. That is the entire equipment list. Read our microgreen seeds buyer's guide if you are not sure what seeds to buy — food-grade seeds germinate at 95-97% versus 50-60% for grocery seeds, and the difference is visible in your first tray.
Why Radish Microgreens Are India's Best Beginner Crop
Every microgreen variety has a climate sweet spot. For India — high humidity, summer heat peaks above 38°C, and a four-month monsoon — radish sits in that sweet spot year-round in a way that no other common variety does.
Speed: At 5-7 days from sowing to harvest, radish gives you feedback quickly. If something goes wrong you find out fast and can correct it on the next tray. Slower varieties (broccoli at 8-12 days, sunflower at 7-10 days) require more patience before you know whether your setup is working.
Heat tolerance: Radish seeds germinate reliably above 35°C — a temperature that causes sunflower seeds to go dormant and pea shoots to slow significantly. In Pune's May-June peak, when outdoor temperatures touch 40°C and indoor temperatures sit above 32°C, radish continues producing without modification to your setup.
No pre-soaking: Unlike sunflower seeds, radish does not require any soaking before sowing. The small round seeds absorb moisture directly from damp cocopeat. This removes one entire step and one common failure mode (over-soaking, which causes fermentation and dramatically reduces germination).
High yield per rupee: A 100g pack of organic radish seeds sows 5-6 standard trays. At 15-20g per tray, your cost per tray is among the lowest of any microgreen variety. Each tray yields 60-90g of fresh radish microgreens — enough for a family of four to top their meals for 2-3 days.
Radish vs Sunflower vs Broccoli: Radish wins on speed (5-7 days), heat tolerance, and yield per rupee. Sunflower wins on flavour (milder, nuttier) and stem thickness. Broccoli wins on sulforaphane concentration but takes 8-12 days. For a family starting out, growing all three in rotation — radish first week, sunflower and broccoli starting a few days later — gives continuous harvest with nutritional variety.
What You Need: Complete Equipment List
Seeds
Organic radish seeds — 15-20g per 30x20cm tray. Use seeds sold specifically as microgreen or sprouting seeds with a printed germination rate (look for 90%+). Do not use radish seeds from a garden centre or grocery store — garden seeds are often treated with fungicide and grocery seeds are not tested for germination rate.
Growing Medium
Cocopeat is the best growing medium for Indian home growers. It is sterile (no soil pathogens or fungal spores), retains moisture without waterlogging, drains well through tray holes, and resists mould better than soil in India's humid climate. SAGreens grows all its microgreens on cocopeat.
A standard brick of cocopeat (available in any garden or nursery supply store) costs ₹30-60 and expands to fill 5-8 standard trays. Hydrate by adding water gradually until it reaches the consistency of a wrung-out sponge — moist but not wet or dripping.
Tray
Any shallow container works: a purpose-built microgreen tray with drainage holes (₹80-150 from garden stores), a repurposed food container with holes drilled in the base, or even a lined tray with drainage slits cut in. The tray should be 4-6cm deep. Drainage is essential — standing water at the base is the single biggest cause of mould in radish microgreens.
Blackout Cover
Any flat, opaque object: a second tray inverted, a piece of cardboard, a cutting board. Weight is optional for radish (unlike sunflower, which requires 1-2kg to shed hulls). A light cover is sufficient to keep seeds in darkness during germination.
Spray Bottle
A fine-mist spray bottle for the first 1-2 days while seeds are germinating. Once roots have anchored into cocopeat (from day 3 onward), switch to bottom watering — pour water into the tray's base plate and let cocopeat absorb from below.
Step-by-Step Growing Guide
Step 1 — Prepare Your Tray (Day 0, 10 minutes)
Fill your tray with hydrated cocopeat to a depth of 3-4cm. Press down gently to create a flat, even surface — no hills or valleys. The surface should be level so seeds distribute evenly and moisture is consistent across the tray. If your tray has large drainage holes, line the base with a thin layer of cocopeat or a piece of jute mesh to prevent seeds from falling through.
Step 2 — Sow the Seeds (Day 0, 5 minutes)
Measure 15-20g of radish seeds (about 2-3 tablespoons for a 30x20cm tray). Sprinkle seeds evenly across the surface — aim for roughly 10-12 seeds per square centimetre. Radish seeds are small enough to roll slightly; sow from low height and work methodically from one edge to the other. Avoid thick clumps — overcrowded seeds create mould niduses and uneven germination.
Mist the surface lightly with your spray bottle. Seeds should be damp but not sitting in puddles. Do not press seeds into the cocopeat — simply lay them on the surface.
Step 3 — Blackout Phase (Days 0-2)
Cover the tray with your blackout cover and place in a warm location (22-35°C is ideal; radish tolerates higher). The blackout phase does two things: it creates the humid, dark environment seeds need to germinate, and it encourages the seedlings to stretch upward searching for light, producing longer, more harvestable stems.
Unlike sunflower, radish does not need significant weight on the cover. A light cover is sufficient.
Day 1 check: Lift the cover briefly and mist the surface if it looks dry. You may see the first tiny white root tips (radicles) emerging — this is normal and good.
Day 2 check: You should see clear germination — white-yellow sprouts pushing upward. The seed coat (hull) on radish is small and usually drops cleanly; you do not need to do anything to assist it.
Blackout tip: In India's monsoon months (June-September), the blackout environment can become too humid and encourage mould. Leave a small gap at one side of the cover for slight air circulation. If you see white fuzz (mould) on the cocopeat surface, increase ventilation and reduce misting frequency immediately.
Step 4 — Move to Light (Day 2-3)
When sprouts are 1-2cm tall and clearly upright, remove the blackout cover and move the tray to indirect bright light — a window ledge or balcony with 4-6 hours of morning sun, or a spot with bright indoor light. Direct afternoon sun above 40°C can scorch the delicate cotyledons; morning sun is ideal.
From day 3 onward, switch from surface misting to bottom watering: pour 100-150ml of water into the tray's base plate (or sit the tray in a shallow dish of water for 5-10 minutes). This keeps the roots moist without wetting the leaves, which dramatically reduces mould risk.
Day 3-4: Cotyledons begin to open and turn bright green as chlorophyll develops. The colour deepens from pale yellow-green to vibrant green within 24-48 hours of light exposure.
Day 4-5: Cotyledons are fully open and the canopy is dense and green. This is approaching harvest window.
Step 5 — Harvest (Day 5-7)
Harvest when cotyledons are fully open and the canopy is dense and uniform — typically 5-8cm tall. Do not wait for true leaves (the second pair of leaves with the characteristic radish shape) to emerge, as they are bitter and fibrous.
Use sharp kitchen scissors or a knife. Cut just above the cocopeat surface, leaving the roots in the tray for composting. Harvest the entire tray at once — radish microgreens do not regenerate after cutting the way pea shoots do.
Yield: A 30x20cm tray typically yields 60-90g of fresh radish microgreens.
Storage: Rinse, spin dry gently in a salad spinner, and store in an airtight container lined with a paper towel in the refrigerator. Keeps for 5-7 days. Do not wash until just before eating.
Radish Microgreens in Every Indian Season
| Season | Months (Pune) | Notes |
|---|---|---|
| Winter | Nov-Feb | Ideal — fast germination, low mould, crisp leaves. Best quality harvests. |
| Pre-summer | Mar-Apr | Still excellent. Germination stays fast as temps rise. |
| Summer | May-Jun | Best variety for this season. Germinates at 38-40°C where others fail. |
| Monsoon | Jul-Sep | Manageable — increase ventilation, reduce watering, add air circulation. |
| Post-monsoon | Oct-Nov | Excellent — fast, clean, high yield as humidity drops. |
Radish is the only microgreen variety SAGreens recommends without reservation for year-round growing in Pune. Every other common variety has at least one season where extra management is needed; radish powers through all four.
Troubleshooting: Common Problems and Fixes
Mould on Cocopeat Surface
Cause: Overwatering, insufficient drainage, no air circulation, or seeds sown too thickly.
Fix: Reduce watering frequency. Ensure the tray has drainage holes and is not sitting in standing water. Increase ventilation (a small fan on low nearby helps greatly during monsoon). Check that seeds are not overlapping in thick clumps. If mould has appeared, remove affected area, increase air circulation, and water only from the bottom going forward. Light mould on the cocopeat surface (not on the stems or leaves) is common and the crop is usually still harvestable.
Uneven Germination
Cause: Uneven sowing, uneven cocopeat moisture, or poor seed quality.
Fix: Check seed source — food-grade seeds with 95%+ germination rate sow evenly. If the problem is sowing technique, practice distributing seeds from a lower height. Ensure cocopeat is consistently damp across the full tray before sowing. Dry patches in the cocopeat cause germination gaps.
Yellow or Pale Cotyledons
Cause: Insufficient light after the blackout phase.
Fix: Move to brighter light. Radish needs 4-6 hours of indirect bright light or morning sun to develop chlorophyll fully. Cotyledons should turn deep green within 24-48 hours of adequate light exposure. If growing in a north-facing room with limited natural light, supplement with a full-spectrum LED lamp for 12-14 hours daily.
Leggy, Thin Stems
Cause: Reaching for light — the light source is too far, too dim, or at an angle.
Fix: Move the tray closer to the light source or switch to a brighter location. Stems that lean toward one light source can be rotated 180 degrees daily to straighten. Radish stems should be upright and reasonably thick (2-3mm) at harvest.
Slow Growth (Taking More Than 8 Days)
Cause: Temperature too low (below 18°C) or old/poor quality seeds.
Fix: Move to a warmer location (inside near a south-facing window in winter). If growing in December-January in Pune with night temperatures below 15°C, add a seedling heat mat or move trays to the warmest room in the house during germination. Below 15°C, radish germination slows significantly.
Nutrition: Why Radish Microgreens Are Worth Growing
Radish microgreens deliver some of the highest concentrations of key nutrients of any common microgreen species:
| Nutrient | Radish Microgreens | Mature Radish | Multiple |
|---|---|---|---|
| Vitamin C | 190mg/100g | 14.8mg/100g | 13x |
| Glucoraphasatin | 29mg/100g | Trace | Very high |
| Vitamin E | 7.9mg/100g | 0.08mg/100g | 99x |
| Folate | 95mcg/100g | 25mcg/100g | 3.8x |
| Anthocyanins | High | Low | 5-10x |
The glucoraphasatin content is particularly notable for Indian consumers — it converts to sulforaphane through the same enzymatic pathway as broccoli's glucoraphanin, providing similar cancer-protective and anti-inflammatory effects. For diabetes management, the glucosinolates in radish microgreens have been shown to improve insulin sensitivity and reduce post-meal blood glucose spikes. Read our microgreens for diabetes guide for the full evidence base.
Radish microgreens are also the variety with the most pronounced bitter-peppery flavour among common microgreens — a flavour marker that correlates directly with glucosinolate content. The sharper the flavour, the higher the active compound concentration.
From Harvest to Table: Indian Ways to Use Radish Microgreens
The peppery bite of radish microgreens works particularly well in Indian food:
One 30x20cm tray (60-90g yield) serves a family of four as a topping or garnish for 2-3 days. Two trays started 3 days apart gives continuous supply.
How to Order Radish Seeds and Fresh Microgreens in Pune
If you want to start growing immediately, SAGreens' organic radish seeds are available with same-day delivery across Pune. A 100g pack (₹120) gives you 8-10 standard trays — enough for about two months of weekly growing.
If you prefer to eat fresh microgreens without growing, our fresh radish microgreens are harvested the same morning and delivered across Keshav Nagar, Viman Nagar, Koregaon Park, Baner, Kalyani Nagar, Magarpatta, Hadapsar, and Kharadi.
For personalised growing advice, seed quantity recommendations, or to set up a weekly delivery, contact SAGreens via WhatsApp at +91 9970958370.
Seed Quality & Pricing: All SAGreens microgreen seeds are NPOP-certified organic — untreated, non-GMO, germination tested before dispatch. Seeds start at ₹50/100g (wheatgrass), ₹124/100g (sunflower, mustard) and ₹120/100g (radish). Delivery charged at checkout, by city and weight. Browse the seed range or contact us for bulk pricing.
Frequently Asked Questions
How long do radish microgreens take to grow?
Radish microgreens are ready to harvest in 5-7 days from sowing — the fastest of all common microgreen varieties. In warm Indian conditions (25-35°C), germination completes in 24-36 hours. The blackout phase lasts 1-2 days, followed by 3-4 days of light phase before harvest.
Do radish microgreen seeds need soaking before planting?
No. Unlike sunflower seeds, radish seeds do not require pre-soaking. They are small enough to absorb moisture directly from damp cocopeat. Soaking radish seeds actually increases mould risk by introducing excess moisture. Simply sow dry seeds on dampened cocopeat and mist once.
How many radish seeds do I need per tray?
For a standard 30x20cm tray, use 15-20g of radish seeds — approximately 2-3 tablespoons. A 100g pack of seeds gives 5-6 standard trays, making radish one of the most economical microgreens to grow at home.
Can radish microgreens grow in Indian summer heat?
Yes — radish is the best heat-tolerant microgreen for Indian conditions. Seeds germinate reliably even above 35-38°C, where sunflower and pea shoots struggle significantly. This makes radish the go-to variety for May-June growing in Pune and across India's hot climate regions.
Why are my radish microgreens yellow instead of green?
Yellow cotyledons mean insufficient light exposure after the blackout phase. Move the tray to brighter indirect light or morning sun. Cotyledons should green up within 24-48 hours of adequate light. A north-facing room with no direct light is too dim; supplement with a full-spectrum LED lamp if needed.
Can I grow radish microgreens without drainage holes?
Drainage is essential. Without drainage holes, water pools at the base of the tray and creates the exact conditions — stagnant moisture, no air circulation — that cause mould and root rot. If your container has no holes, drill or poke at least 8-10 small holes in the base before using it.
What is the difference between radish microgreens and sprouts?
Sprouts are grown in water or jars without any growing medium and eaten with roots intact. Microgreens are grown in cocopeat or soil and harvested by cutting above the root. Microgreens have higher nutrient concentrations per gram (as they develop fully formed leaves and photosynthesise), a distinct flavour profile, and longer shelf life. They are also lower in contamination risk than water-sprouted sprouts.
How do I store radish microgreens after harvest?
Rinse gently, spin dry in a salad spinner, and store in an airtight container lined with paper towel in the refrigerator. They keep for 5-7 days refrigerated. Do not wash until just before eating — excess moisture shortens storage life. Unwashed radish microgreens can sometimes keep for 8-10 days at 2-4°C.
Can I grow radish microgreens on soil instead of cocopeat?
You can, but cocopeat is strongly preferred for Indian indoor conditions. Garden soil introduces fungal spores, insects, and weed seeds. It also retains more moisture than cocopeat, increasing mould risk in India's humid climate. Cocopeat is sterile, consistent, and drains better — the investment in a 500g cocopeat block (₹30-60) is worthwhile for every batch.
When should I harvest radish microgreens?
Harvest when cotyledons are fully open and the canopy stands 5-8cm tall — typically day 5-7. Do not wait for true leaves, which are bitter and fibrous. Harvesting at the cotyledon stage gives the highest glucosinolate content and the best flavour. If you prefer a milder flavour, harvest 1 day earlier; for a sharper pepper note, wait until day 7.
What do microgreen seeds cost to buy in India?
Microgreen seeds from SAGreens: sunflower at ₹100 per 100g, radish ₹150, mustard ₹100–₹120, broccoli ₹200, fenugreek ₹80. Each 100g packet grows 2–4 standard trays at home. Browse all seed varieties or WhatsApp SAGreens for bulk pricing and growing advice.
*This guide is written by the SAGreens team, led by Ajay Toradmal — a three-generation farming family from Keshav Nagar, Pune, Maharashtra. We have grown radish microgreens across every season and in every Indian climate condition. Contact us for seeds, fresh microgreens, or personalised growing advice.*
Related Reading
More Microgreens Tips & Recipes
How to Grow Pea Shoot Microgreens at Home
Step-by-step guide to growing pea shoot microgreens at home. Soak, sow, blackout, harvest in 10-14 days. Sweet flavour, rich in vitamin K and protein.
How to Grow Sunflower Microgreens at Home
Step-by-step guide to growing sunflower microgreens at home in India. Seed soaking, sowing, blackout phase, harvest at 8-10 cm and India seasonal tips.
Microgreens Kerala Growing Guide | Tropical Climate Tips
Complete guide to growing microgreens in Kerala's tropical climate. Best varieties for humidity, monsoon tips, seed sourcing. Kochi delivery.
Fresh Tips & Exclusive Offers
Subscribe for growing tips, seasonal updates, and exclusive offers on fresh organic microgreens in Pune.