Microgreen Growing Trays: Size, Drainage and Setup
Why the Tray Decides More Than People Expect
Most first microgreen crops fail for a reason that has nothing to do with the seed. The seed germinates, the tray greens up, and then the bottom of the crop turns slimy around day six. Almost every time, the cause is water sitting where it should not, and that is a tray problem rather than a seed problem.
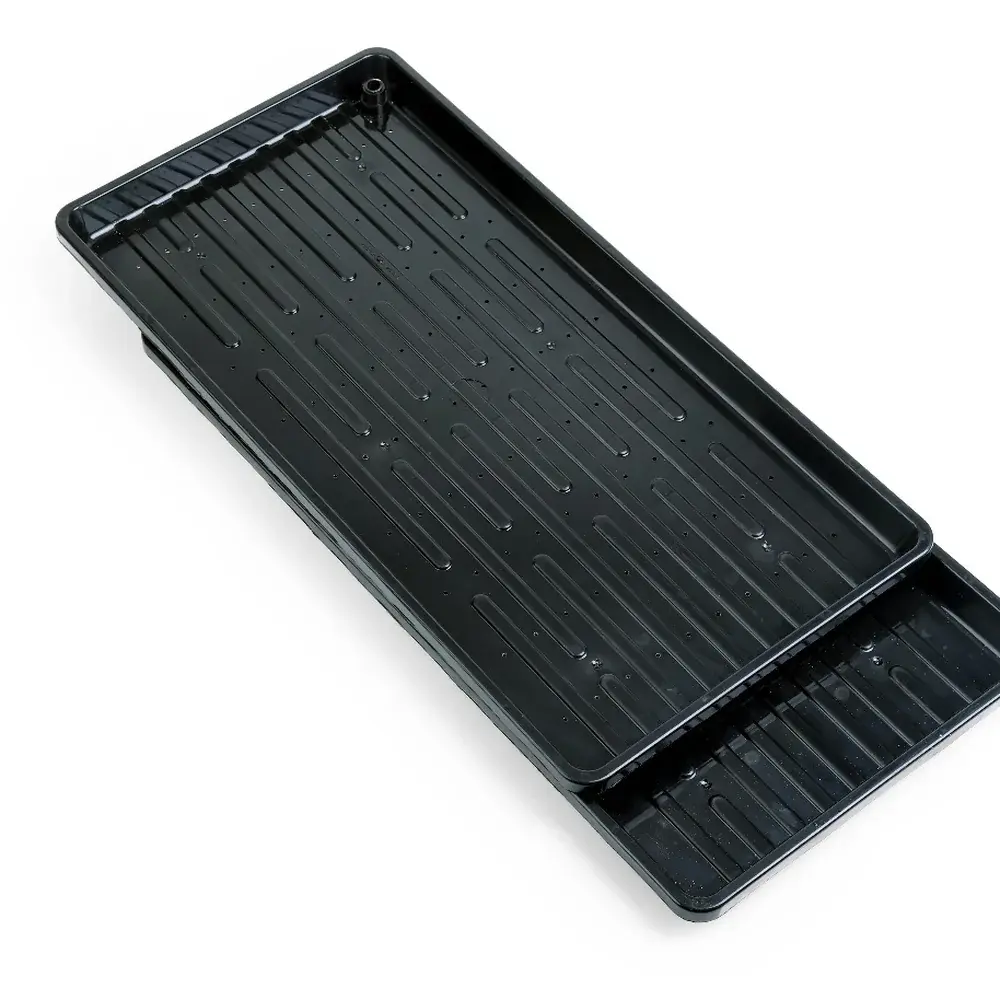
Key Takeaways: Microgreen growing trays need to be shallow, food grade and used in pairs: one tray with drain holes to hold the crop, one solid tray underneath to hold the water. Our 600 by 300 mm tray set is 30 mm deep in 2 mm food-grade HDPE at 460 rupees the pair. Sowing rates on this site are written for a 25cm by 25cm tray, so multiply them by 2.9 for this footprint. Bottom water into the solid tray, never over the leaves, and rinse and sun-dry both trays between crops.
A tray is doing four jobs at once. It holds a bed of medium level enough that small seed does not roll into a hollow. It lets excess water leave the root zone instead of standing in it. It gives the roots darkness while the leaves get light. And it survives being lifted when loaded, which on a full tray is a couple of kilograms of wet cocopeat and crop.
Get those four right and the crop mostly looks after itself. Get the drainage wrong and no amount of care with the seed will save it.
This guide covers what size tray to use, why the pair matters, how deep is deep enough, how to convert a sowing rate to your tray, and how to look after trays so they last years rather than months.
The Two Trays, and Why the Pair Is the Point
The single most useful thing to understand about microgreen trays is that you need two of them, and they must be different from each other.
The holed tray, where the crop lives
The upper tray carries the cocopeat and the crop. It has drain holes across the base, which means water can never pool around the roots. When you water, the surplus leaves immediately rather than sitting in the bottom few millimetres of medium where it would starve the roots of air and start rot.
This is the tray you sow into, the tray you cover during blackout, and the tray you carry to the sink at harvest.
The solid tray, where the water lives
The lower tray has no holes at all. It sits underneath as a reservoir. You pour water into it, and the holed tray resting inside draws that water up through the cocopeat by capillary action.
That is the whole trick. The medium gets wet from below, the leaves stay dry on top, and the canopy never spends hours damp. Wet leaves in a dense stand of brassica seedlings are how mould starts, and in Indian humidity that is the most common single reason a home crop is lost. Our monsoon growing guide goes further into managing humidity through the rains.
What goes wrong with two of the same kind
People buy two trays of the same type all the time, and both versions fail in their own way.
Two holed trays cannot bottom water each other, because the water runs straight through both and out onto the shelf. You are forced back to misting from above, which is exactly the habit the pair exists to remove.
Two solid trays are worse. The crop sits in a sealed box with nowhere for surplus water to go. The medium stays saturated, the roots cannot breathe, and the tray sours from the bottom up. If you have ever lifted a tray and smelled something like stagnant water, that is what happened.
Buy the pair, not two of the same. One holed tray and one solid tray is not a packaging decision, it is the mechanism that keeps water away from the leaves and air around the roots.
Tray Size: the 600 by 300 mm Standard
Our tray set is 600 by 300 by 30 mm, which is 60 by 30 cm and 3 cm deep. That is 1,800 square centimetres of growing surface per tray.
Why this footprint and not another
Three practical reasons.
It fits Indian homes. A 60 by 30 cm tray sits on a standard windowsill ledge, on a kitchen counter without taking the whole counter, and on the shelf of an ordinary wire rack. Two of them fit side by side on most balcony shelves.
It gives a usable harvest. One tray of a dense variety produces enough for a household to eat through a week rather than a single garnish. Our sowing rate guide works through the yields variety by variety.
It is a size the supply chain actually makes. Trays moulded to odd dimensions are expensive and hard to replace. Ours are made by Shivraj Agro Tech to our specification, which means we can keep supplying the same tray rather than a slightly different one every year, and your sowing rates stay valid.
Converting a sowing rate to a different tray
This is where most people go wrong, and the error is always in the same direction.
Scale by area, never by eye
Every sowing rate on this site is written for a 25cm by 25cm tray, which is 625 square centimetres. That is the baseline. To use any other tray, work out its area and scale the rate by the ratio.
| Tray | Area | Multiply the baseline rate by |
|---|---|---|
| 25cm by 25cm (the baseline) | 625 cm² | 1 |
| 25cm by 35cm | 875 cm² | 1.4 |
| 10 by 20 inch, roughly 25cm by 50cm | 1,250 cm² | 2 |
| 600 by 300 mm, our tray | 1,800 cm² | 2.9 |
So on our tray, small seed such as radish, mustard or broccoli goes in at roughly 23 to 35 grams rather than the 8 to 12 grams quoted for the baseline tray. Large seed such as sunflower or pea shoots goes in at roughly 43 to 58 grams rather than 15 to 20.
A worked example on a 25 cm square tray
Suppose you have a 25cm square tray from a nursery and you want to grow radish. The guide says 8 to 12 grams. Your tray is the baseline, so you use 8 to 12 grams. No conversion needed.
Now suppose you move that crop to our 600 by 300 mm tray. The area goes from 625 to 1,800 square centimetres, a factor of 2.9. Multiply 8 to 12 by 2.9 and you get 23 to 35 grams.
Scale by area and not by the longest side. A tray twice as long and twice as wide holds four times the seed, not twice. That mistake halves the density and produces a thin, floppy crop that never forms a proper canopy.
On a 600 by 300 mm tray, use 23 to 35 grams of small seed and 43 to 58 grams of large seed. Those are the 25cm baseline rates multiplied by 2.9, which is the area ratio between the two trays.
Depth, Drainage and Material
Why 30 mm of depth is enough
Microgreens are harvested at the first true leaf stage, between six and fourteen days depending on variety. In that time the root system never gets deep. It spreads sideways through the top two to three centimetres of medium and stops.
A deeper tray does not grow a better crop. It holds more medium, which costs more, weighs more and dries more slowly, and a slow-drying bed is the opposite of what you want in a humid climate. Thirty millimetres is enough depth to hold two to three centimetres of cocopeat with a few millimetres of freeboard, and nothing is gained past that.
Drainage: how many holes, and where they belong
What matters is that holes are spread across the whole base, not clustered in the middle.
A tray with four holes in the centre drains the centre. The corners stay wet, and a crop grown in that tray goes mouldy at the edges while the middle looks perfect. If you are improvising a tray by drilling your own, space the holes evenly across the base rather than putting a neat row down the middle.
The holes also need to be small enough that moist cocopeat does not wash through them. Our cocopeat block expands into a fine medium, and a tray with large drainage slots will lose some of it into the reservoir below on the first watering.
Food-grade HDPE, and what the 2 mm wall is for
Our trays are moulded from 2 mm food-grade virgin HDPE. Both halves of that matter.
Food grade matters because microgreens are eaten raw, and the crop is in direct contact with the tray for its entire life. Recycled or unspecified plastic has no guarantee about what is in it, and a crop you eat uncooked is the wrong place to take that risk.
Virgin rather than recycled matters for the same reason, and also for durability. Recycled plastic is less consistent, and inconsistency in a thin moulding shows up as a crack.
What thin trays do after a few cycles
The usual way a tray dies is not wear, it is cracking under load. A 600 by 300 mm tray filled with moist cocopeat and a mature crop carries a couple of kilograms. Lift it by one end and all that weight pivots on the corners.
Thin trays flex when you do that, and flexing plastic eventually splits, almost always at a corner. A 2 mm wall is the difference between a tray that takes many cycles and one that cracks in a season. Ours are rated to hold 10 to 12 kilograms and weigh 450 grams each, which is the weight you would expect from a wall that thick.
Why the trays are black and not clear
Roots want darkness. A clear or white tray lets light into the root zone, which encourages algae on the surface of the medium and on the tray walls, and gives you something green and slimy to scrub off between crops.
Black trays keep the root zone dark even when the crop is in full light, so you get the blackout benefit at the roots without needing anything extra once the leaves are up.
Setting Up a Tray, Step by Step
Step 1: nest the holed tray inside the solid one
Do this before you fill anything. Trying to lower a full tray into a reservoir is how cocopeat ends up on the floor.
Step 2: fill with cocopeat and level it properly
Fill the holed tray with two to three centimetres of pre-moistened cocopeat, then level it with the flat of your hand or a straight edge.
Levelling is the step people skip and it matters more than it sounds. Small seed rolls. Any dip in the surface collects seed, and a tray sown into hollows comes up in patches with bare ground between them. Our cocopeat guide covers preparing the medium to the right moisture, and our ready-to-use growing mix saves the soaking step if you would rather not do it.
Pre-moistened means damp enough to hold together when squeezed, not wet enough to drip.
Step 3: sow at the rate for your variety
Weigh the seed rather than guessing, and use the converted rate for this tray: 23 to 35 grams for small seed, 43 to 58 grams for large.
Scatter from fifteen to twenty centimetres above the surface rather than close to it. The extra distance lets the seed spread out as it falls instead of landing in clumps.
Step 4: blackout, with weight on top
Cover the sown tray and put a light weight on the cover. The weight is doing real work: resistance makes the stems push upward and stand straight rather than sprawling, and it presses the seed into contact with the medium so germination is even.
Most growers invert a second solid tray on top for this, which is one reason a spare solid tray is useful. Anything flat and opaque works.
Step 5: light, then bottom watering only
Once the seedlings are standing and the cotyledons are opening, uncover and move the tray into light. From that point on, water only into the solid tray underneath. Never over the leaves.
For the full growing sequence rather than the tray mechanics, our home growing guide walks through a crop from sowing to harvest.
Bottom Watering: the Technique the Pair Exists For
How much water to pour, and how often
Pour into the reservoir until the cocopeat is drawing water up and the surface darkens slightly, then stop. The medium should be damp all the way through and the surface should not be shining wet. Our cocopeat growing guide covers how to judge that moisture level by feel.
Check daily rather than watering on a schedule. A tray in a warm, dry room needs water more often than the same tray in a humid one, and the only reliable test is lifting the holed tray and feeling the weight.
If water is still standing in the reservoir the next day, you poured too much. Tip the surplus out rather than leaving it, because a reservoir that never empties is a reservoir that goes stale.
The signs you are overwatering
Three tells, in the order they usually appear.
A sour or stagnant smell when you lift the tray. That is the first warning and it comes before anything is visible.
A slimy, translucent look at the base of the stems, where they meet the medium. This is not the same as root hairs, which are fine white fuzz on the roots themselves and are perfectly normal.
Yellowing in the lower leaves while the tops still look fine.
Root hairs are fine, white and attached to the roots. Mould is grey or cobwebby and sits on the surface of the medium or climbs the stems. Growers throw away healthy trays every week because the two look alike at a glance.
Cleaning and Reusing Trays
Between crops
Empty the spent medium, rinse both trays under a tap, and dry them in the sun. That is genuinely it for most crops. HDPE does not absorb water or odour, so there is nothing to scrub out of the material itself.
Sun-drying is worth the trouble rather than towel-drying. Ultraviolet light and a properly dry surface between crops do more against carried-over spores than a rinse alone.
Through the monsoon
In the rains, trays often cannot dry outside. Wipe both trays fully dry with a cloth instead of leaving them to air dry in humid air, and store them separated rather than nested, because two damp trays stacked together stay damp for days.
If you have had a mould problem, wash with a mild dish soap, rinse thoroughly so no residue is left, and dry fully before the next sowing. Our monsoon growing guide covers the airflow habits that stop it recurring.
When to retire a tray
Retire a tray when it cracks, not when it looks tired. Scratches and staining on HDPE are cosmetic and do not affect a crop. A crack is different: it leaks, it flexes further each lift, and a cracked holed tray no longer sits level in its reservoir, which gives you uneven watering across the bed.
How Many Trays a Household Actually Needs
A one-tray-a-week rotation
For most households, two sets is the sensible number, and that is four trays in total.
Sow one tray. A week later, sow the second while the first is finishing. Harvest the first, clean it, and sow it again the week after. You end up cutting fresh greens every week from a rotation that takes about ten minutes of attention a week.
One set works if you are happy with a gap between crops. The gap is the problem with a single tray: there is nothing growing while you clean and resow.
| Setup | Trays | What it gives you |
|---|---|---|
| One set | 2 | One crop at a time, with a gap between |
| Two sets | 4 | A continuous weekly harvest |
| Four sets | 8 | Two varieties on a weekly cycle |
| A shelf rack | 12 or more | Enough for a household plus regular giving away |
Scaling to a shelf
Past about eight trays, the constraint stops being trays and becomes shelving and light. A two or three tier wire rack holds two trays per shelf comfortably, and if your window cannot light all the tiers, the lower ones need a strip light.
At that point you are also buying seed in larger quantities, and the economics change. If you are planning a weekly tray count for a kitchen, a cafe or a small growing business, write to us through our contact page with the numbers and we will quote against them honestly.
The Tray Mistakes We See Most
Using two trays of the same kind, which removes the ability to bottom water.
Filling too deep. Four or five centimetres of cocopeat costs more, weighs more and dries more slowly, and the roots never reach it.
Not levelling the medium, which gives a patchy stand with bare spots.
Scaling sowing rates by the longest side instead of by area, which under-sows a larger tray by a factor of two or three. The conversion table in our sowing rate guide does the arithmetic for every common tray size.
Watering over the leaves out of habit once the crop is in light, which undoes the whole point of the pair.
Nesting wet trays together for storage, especially in the monsoon.
Drilling drain holes only in the middle of an improvised tray, which leaves the corners waterlogged.
For the mistakes that happen after the tray is set up rather than during, our microgreen growing mistakes guide covers the rest.
What a Tray Set Costs, and What Ships With It
The set is two trays, one holed and one solid, at 460 rupees for the pair. That works out at 230 rupees a tray, and the trays outlast many crops, so the per-crop cost is small against the seed.
The pair weighs 900 grams, which puts a tray-only order at the top of the second delivery band, at 130 rupees. Worth knowing if you are adding seed to the order: the trays alone sit right at that band ceiling, so a 100g seed pack on the same order tips it into the next band at 165 rupees. Ordering the trays with a larger seed order rather than on their own is usually the better value, because delivery is banded by weight rather than charged per item.
There is no lid in the set. For blackout, most growers invert a second solid tray or use any flat opaque cover with a light weight on it.
If you are starting from nothing, the tray set plus a cocopeat block and one pack of seed is the whole shopping list. Our beginner seed guide covers which variety to start with, and our seed price guide sets out what seed costs by variety.
Frequently Asked Questions About Microgreen Trays
What size tray is best for growing microgreens at home?
A shallow tray between 25cm by 25cm and 60cm by 30cm, around 3cm deep. Smaller than that and the harvest is a garnish rather than a meal; deeper than that and you are paying for medium the roots never reach. Our set is 600 by 300 mm, which fits a standard windowsill and gives a household-sized cut from one tray.
Do microgreen trays need drainage holes?
The tray the crop grows in does, and the tray underneath must not have them. Holes in the upper tray let surplus water leave the root zone. The solid tray below holds the water you pour, so the medium wets from beneath and the leaves stay dry.
How deep should a microgreen tray be?
About 3cm, holding 2 to 3cm of medium. Microgreens are cut at the first true leaf stage and the roots spread sideways through the top couple of centimetres rather than going down. Extra depth adds cost and weight and slows drying, which works against you in humid conditions.
How much seed do I need for a 600 by 300 mm tray?
Roughly 23 to 35 grams of small seed such as radish, mustard or broccoli, and 43 to 58 grams of large seed such as sunflower or pea. Those are the 25cm baseline rates from our sowing rate guide multiplied by 2.9, which is the area ratio between a 25cm square tray and this one.
How much cocopeat does one microgreen tray need?
Two to three centimetres across a 600 by 300 mm tray is about 4.5 litres of medium. A one kilogram cocopeat block expands to roughly 12 to 14 litres, so one block fills about three of these trays.
Can I use kitchen containers instead of proper microgreen trays?
For one experimental crop, yes. Use two containers of the same size, punch evenly spaced holes in the base of one, and nest it in the other. Two things usually catch people out: the holes end up clustered in the middle, which leaves the corners waterlogged, and food containers are often too deep, so you fill them with more medium than the crop needs.
How do I bottom water a microgreen tray?
Pour water into the solid tray underneath until the medium darkens slightly as it draws up, then stop. Never pour over the leaves once the crop is in light. If water is still standing in the reservoir the following day, tip it out and pour less next time.
Why do my microgreens come up patchy on one side of the tray?
Almost always an unlevel bed. Small seed rolls into any dip, so the hollows come up dense and the high spots come up bare. Level the cocopeat with a straight edge before sowing. The other cause is uneven scattering, which sowing from fifteen to twenty centimetres above the tray largely fixes.
Should I put weight on the tray during blackout?
Yes, a light weight on the cover. The resistance makes stems push upward and stand straight instead of sprawling, and it presses seed into contact with the medium so germination is even. A second solid tray inverted on top, with a book on it, is all it takes.
How many microgreen trays do I need for a continuous harvest?
Two sets, so four trays. Sow one set, sow the second a week later, and harvest, clean and resow on a rotation. One set gives you a gap with nothing growing while you turn the tray around.
How do I clean microgreen trays between crops?
Empty the medium, rinse both trays under a tap, and dry them in the sun. HDPE does not absorb water or odour, so there is nothing to scrub out of the material. Sun-drying between crops does more against carried-over spores than rinsing alone.
Do I need to sanitise microgreen trays, and with what?
Not routinely. A rinse and a proper sun-dry is enough for a tray that has grown a clean crop. After a crop that went mouldy, wash with a mild dish soap, rinse until no residue is left, and dry completely before sowing again.
Can I stack microgreen trays to save space?
Stack them for storage when dry, never while a crop is growing: a tray stacked on a growing crop blocks light and traps moisture in the canopy. For storage through the monsoon, keep trays separated rather than nested, because two damp trays stacked together stay damp for days.
What is a 1020 tray, and is it the same size as the SAGreens tray?
A 1020 tray is the American standard, roughly 10 by 20 inches or 25cm by 50cm, which is 1,250 square centimetres. Ours is larger at 1,800 square centimetres. If you are following an American guide written for a 1020 tray, multiply its seed quantity by about 1.4 for our tray.
Can I grow microgreens without a tray at all?
You can grow a small crop on a plate or in a shallow dish, and people do for a first try. What you give up is drainage, so you have to water very sparingly and the risk of a sour, waterlogged bed is much higher. It is a way to test whether you enjoy growing, not a way to grow regularly.
How long do plastic microgreen trays last?
Many cycles, if they are rinsed and dried between crops and not flexed when loaded. The usual end is a crack at a corner from lifting a heavy tray by one end, rather than the plastic wearing out. The 2 mm wall and the 10 to 12 kilogram rating on ours are there to delay exactly that.
Getting Your First Tray Set
If you are buying one thing to make your microgreens more reliable, buy the right pair of trays before you buy anything else. Better seed will not fix standing water, and a levelled bed in a tray that drains will carry an ordinary seed lot to a good crop.
SAGreens is run by Ajay Toradmal in Keshav Nagar, Mundhwa, Pune, from a three-generation farming family. We grow on these trays ourselves, which is where the figures on this page come from rather than from a supplier brochure.
Our 600 by 300 mm tray set is 460 rupees the pair, shipped across India alongside cocopeat, ready-to-use growing mix and the full microgreen seed range. If you are not sure how many trays your household would actually use, or you are planning a weekly rotation for a kitchen or a small business, write to us with the numbers and we will tell you honestly what you need.
Fresh Tips & Exclusive Offers
Subscribe for growing tips, seasonal updates, and exclusive offers on fresh organic microgreens in Pune.