Coriander Microgreens Growing Guide for India
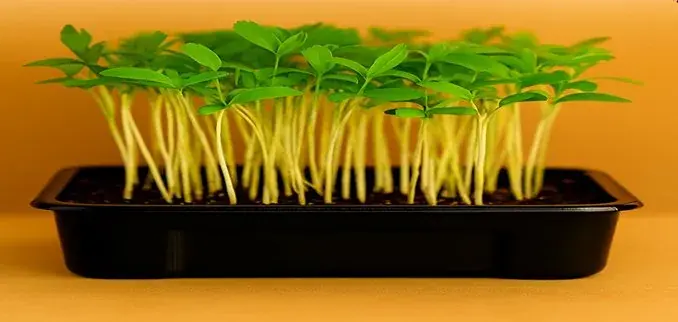
Key Takeaways: Coriander seeds are actually two seeds joined together — they must be pre-soaked for 8-12 hours and gently cracked before sowing. Germination takes 3-5 days (longer than most microgreens) but the wait is worth it. Coriander microgreens taste like concentrated fresh dhania with a slightly warmer, spicier note from the seed's essential oils. Harvest at days 12-16 when cotyledons are fully open. One 10x10 cm tray costs approximately ₹15-20 in seeds and growing medium and yields 60-100 g of fresh microgreens.
Coriander — dhania in Hindi, kothamalli in Tamil, kothimbir in Marathi — is the most universally loved herb in Indian cooking. Its leaves finish dal, its seeds temper oil, its roots flavour curry pastes, and its fresh bunches appear on nearly every Indian thali. As a microgreen, coriander carries the same complex, citrus-herbal aroma that defines the herb, but in concentrated form and with a nutritional profile that surpasses the mature plant in nearly every measurable category.
Coriander microgreens are also one of the more challenging varieties to grow — not difficult once you understand the unique characteristics of coriander seeds, but unforgiving of certain beginner mistakes that would not affect more forgiving varieties like radish or mustard. This guide covers everything you need to know: why coriander seeds require special preparation, a complete day-by-day growing protocol, troubleshooting the slow germination that trips up most first-time growers, seasonal adjustments for India, nutritional data, and twelve ways to use coriander microgreens in Indian cooking.
Why Coriander Seeds Are Unique (and Require Special Treatment)
Coriander is botanically unusual: what is called a "coriander seed" is actually a schizocarp — a dry fruit containing two seeds joined together in a single round husk. Each round coriander seed has two embryos inside, meaning a single seed can produce two seedlings. This two-seeded structure also means the seed coat is thicker and harder than single-seeded crops like radish or mustard.
This has two practical consequences for microgreen growing:
Consequence 1 — Pre-soaking is essential. The thick, double seed husk does not allow water to penetrate and initiate germination as quickly as thinner-coated seeds. Without soaking, germination can be slow and erratic — some seeds sprout in 3 days while others take 8 or more, creating uneven trays where early sprouts are ready to harvest before late-germinators have even emerged. Pre-soaking for 8-12 hours hydrates the seed coat, dramatically improving germination uniformity.
Consequence 2 — Gentle cracking helps. For even faster, more uniform germination, many experienced microgreen growers gently crack the outer husk of coriander seeds by rubbing them lightly between their palms or rolling them across a flat surface with gentle pressure. This breaks the husk into two halves (exposing both embryos) without damaging the seeds inside. You should see and feel the round seeds separate slightly as the husk cracks. This step is optional but consistently improves germination rate from approximately 70-75% (unscarified, unsoked) to 85-90% (soaked and scarified).
What You Need: Equipment and Materials
Growing coriander microgreens at home requires minimal equipment. The following list covers a single 10x10 cm tray:
- Tray with drainage holes: Any shallow plastic tray (1-2 cm deep) with holes drilled or punched in the base. Repurpose old food containers or buy standard microgreen trays (₹50-100 per pair).
- Solid outer tray: A second tray without holes to hold the growing tray for bottom watering.
- Cocopeat: 500 g is sufficient for multiple trays. Pre-hydrate per the standard method (add water, break up lumps, allow to absorb fully).
- Coriander seeds (microgreen grade): 5-8 g per 10x10 cm tray. Buy from a seed supplier who confirms untreated, food-grade seeds. Not all dhania from kirana shops is appropriate — see the seed buying guide below.
- Spray bottle: For gentle misting.
- Cover: A second tray, dark lid, or thick cardboard for the blackout germination phase.
- Small fan: For airflow after uncovering (prevents surface mold, which coriander is somewhat prone to).
Pre-Soaking and Scarification: Step-by-Step
Step 1: Measure your seeds. Weigh 5-8 g of coriander seeds for a 10x10 cm tray. You can estimate by volume — coriander seeds are light, and 5-8 g is roughly 1-1.5 teaspoons.
Step 2: Optional scarification. Place the seeds on a clean, flat surface and roll them gently with the base of a heavy cup or press them lightly between your palms. You should hear and feel a slight cracking as the outer husk separates. The seeds may split into two halves — this is correct. Do not press hard enough to crush the inner seed.
Step 3: Soak. Place seeds (whole or cracked) in a small bowl and cover with room-temperature water at least 3x the volume of seeds. Soak for 8-12 hours. Overnight soaking is convenient — sow the next morning.
Step 4: Drain. After soaking, the water will have turned slightly yellow-green from oils in the seed coat. Drain this water using a fine-mesh strainer (coriander seeds are large enough for a standard kitchen strainer, unlike amaranth). Allow seeds to drain for 5 minutes.
Step 5: Inspect. Soaked coriander seeds swell noticeably and some may have already cracked open. Seeds that are clearly not hydrated (remain hard and shrunken) after 12 hours of soaking have poor viability and can be removed.
Sow immediately — pre-soaked coriander seeds should not be stored for more than a few hours before sowing as they begin consuming stored nutrients once hydration initiates germination.
Day-by-Day Growing Guide: Coriander Microgreens
Day 0: Sowing
Fill your tray with 1.5-2 cm of pre-moistened cocopeat. Spread the soaked, drained coriander seeds evenly across the surface. Because coriander seeds are larger than radish or mustard, aim for seeds touching but not stacked — roughly 1-1.5 seeds per square centimetre (or after cracking, 1-2 halves per sq cm, spaced slightly).
Press seeds gently into the cocopeat surface with a flat card — good seed-to-medium contact is especially important for coriander as the thicker husk needs to remain in contact with moisture to continue absorbing water.
Mist the surface lightly. Cover with a dark lid or second tray. Place in a warm spot (22-30 degrees Celsius). Do not water again until you check on Day 2-3.
Day 1-2: Waiting Phase (Do Not Disturb)
Coriander germinates more slowly than radish or mustard. Do not expect visible sprouting by Day 1. The blackout phase allows the seed to absorb moisture and begin the germination cascade. Lifting the cover repeatedly introduces light that can confuse the photoperiod signal and slow germination. Check once (briefly) on Day 2 if seeds feel very dry — otherwise leave undisturbed.
Day 3-4: First Germination
By Day 3, you should see white radicles (root tips) emerging from many seeds. Fully soaked and scarified seeds often germinate by Day 2. If fewer than 50% of seeds show radicles by Day 4, check: did you soak long enough? Is the room temperature above 20 degrees Celsius? Is the cocopeat adequately moist?
Coriander germination is notoriously uneven compared to brassicas — do not panic if some seeds are significantly ahead of others at this stage. Continue the blackout phase.
Day 5-6: Seedlings Emerging
Most seeds have now sprouted and tiny pale seedlings are pushing upward. A few seeds may still be germinating — this is normal for coriander. The seedlings are pale yellow under the cover (etiolated from darkness, which promotes vertical stem extension). Keep covered until the majority of seedlings are 2-3 cm tall.
Day 6-7: Uncover and Introduce Light
Remove the cover when most seedlings are 2-4 cm tall. Move immediately to a bright light source — an east-facing window in Pune provides ideal light intensity. Coriander microgreens do not need intense light to develop colour (they are not betacyanin-producing like red amaranth), but adequate light is still important for chlorophyll production.
Within 4-6 hours of light exposure, the pale seedlings will visibly green. The characteristic dhania aroma becomes noticeable as soon as chlorophyll synthesis begins.
Begin bottom watering: add 100-150 ml of water to the outer solid tray. Allow cocopeat to absorb what it needs, then drain any standing water after 30 minutes.
Day 7-10: Growth Phase
Coriander microgreens grow more slowly than brassicas after uncovering — 8-12 mm of height per day under good light and comfortable temperatures. Ensure airflow with a small fan to prevent surface mold, which coriander is more prone to than radish or broccoli due to its denser initial seed coverage.
Water every 1-2 days by bottom watering. Avoid top-watering. Check moisture level by pressing a finger 1 cm into the cocopeat.
Day 10-14: Approaching Harvest
The cotyledon (seed leaf) pairs are now fully expanded. Coriander seedling cotyledons are fan-shaped and deeply lobed — distinctive and different from the rounded leaves of most other microgreens. They are bright green and intensely aromatic. The classic dhania fragrance fills the space around the tray.
Taste one microgreen by cutting and chewing. The flavour should be immediately recognisable as coriander — bright, citrus-herbal, with a slightly warmer, almost spicy undertone from the seed's volatile oils that you do not get in mature coriander leaves. If the flavour is good, harvest now. If you want a more intense flavour, allow 1-2 more days.
Day 12-16: Harvest Window
Harvest when cotyledons are fully open and before the first true leaves (which have the characteristic serrated coriander leaf shape) are more than a few millimetres tall. Use clean scissors and cut just above the soil line. Harvest the entire tray in one cut for uniform shelf life, or harvest in sections over 2-3 days as needed.
Expected yield: 60-120 g per 10x10 cm tray, depending on seeding density and growing conditions.
Shelf Life Tip: Coriander microgreens are best consumed within 2-3 days of harvest, making fresh-harvest timing more important than for radish or sunflower microgreens. Harvest just before you need them for maximum flavour and nutritional value.
Nutritional Profile of Coriander Microgreens
Coriander microgreens are not as extensively studied as broccoli or radish microgreens, but published data and USDA nutrient analysis of mature coriander (dhania) leaves suggest the microgreen form provides substantially elevated levels of the same key nutrients:
| Nutrient | Amount per 100 g (fresh) | % Adult Daily Value | Note |
|---|---|---|---|
| Vitamin A (beta-carotene) | 2,100 mcg | ~175% | Exceptional |
| Vitamin C | 57 mg | ~63% | Above daily target in 100 g |
| Vitamin K | 290 mcg | ~242% | Outstanding |
| Calcium | 164 mg | 16% | Meaningful for plant-based diet |
| Iron | 2.7 mg | 15% (men) / 9% (women) | Non-haem iron |
| Lutein + Zeaxanthin | ~1,850 mcg | — | Eye health antioxidants |
Outstanding features:
- Vitamin K at 290 mcg per 100 g makes coriander microgreens one of the highest vitamin K plant foods — critical for bone mineralisation and blood clotting
- Beta-carotene at 2,100 mcg per 100 g — exceptional for an herb, contributing significantly to vitamin A requirements. India has a documented vitamin A deficiency problem affecting children in rural areas.
- Lutein and zeaxanthin — carotenoids specifically concentrated in the macula of the eye. Consistent consumption is associated with reduced risk of age-related macular degeneration.
- Linalool and borneol — the primary volatile compounds responsible for coriander's distinctive aroma — have documented antimicrobial and mild anti-inflammatory properties in laboratory studies.
Troubleshooting: Why Your Coriander Seeds Are Not Germinating
Slow or poor germination is the most common problem with coriander microgreens. Here are the specific causes and fixes:
Problem: Seeds not soaked long enough. Coriander seeds need a full 8-12 hours of soaking. A 2-hour soak is insufficient to adequately hydrate the thick double husk. If you soaked for less than 6 hours, extend the soak next time.
Problem: Old or irradiated seeds. Coriander is commonly irradiated in India to extend shelf life. Irradiation prevents germination. Seeds from a general grocery store or spice shop may not germinate at all or germinate at very low rates. Always buy from a dedicated microgreen or organic seed supplier. Test germination on 10 seeds in a damp cloth before investing in a full tray.
Problem: Temperature too low. Coriander germination is significantly slowed below 18 degrees Celsius. In Pune winters when indoor temperatures drop at night, use a seedling heat mat during the blackout phase or place the covered tray in a warmer spot (above the refrigerator, near the water heater, inside a kitchen cabinet).
Problem: Cocopeat too wet or too dry. Over-wet cocopeat causes seeds to begin fermenting rather than germinating. Under-moist cocopeat does not provide enough sustained moisture for coriander's thick husk. The cocopeat should feel like a well-squeezed sponge — moist but releasing only a few drops when squeezed firmly.
Problem: Seeds on the surface not pressing into medium. Coriander seeds that sit on top of the cocopeat without firm contact do not absorb moisture efficiently. Always press seeds gently but firmly into the surface after spreading.
Growing Coriander Microgreens Through India's Seasons
Coriander is a cool-season herb in its mature form, and coriander microgreens reflect this preference:
Post-monsoon / Autumn (October-November in Pune): The best season for coriander microgreens. Mild temperatures (22-30 degrees Celsius), comfortable humidity (50-65% RH), and good light clarity create ideal conditions. Germination is reliable, growth is uniform, and the 12-14 day harvest timeline is consistent. Beginners should start here.
Winter (December-February): Excellent quality coriander microgreens but slower growth. Germination extends to Day 5-7 at lower indoor temperatures. Use a heat mat during germination. Post-germination growth is slow but produces intensely flavoured, nutrient-dense microgreens. Harvest at days 14-18 rather than 12-14. Mold risk is very low in winter — a real advantage for the mold-susceptible coriander.
Summer (March-May): Challenging for coriander. Temperatures above 32 degrees Celsius cause rapid moisture loss and encourage bacterial growth that competes with germination. If growing in summer, keep trays in a cooled room, reduce seed density to improve airflow, and plan for harvest at 10-12 days (coriander grows faster but becomes bitter faster in heat). The flavour is less nuanced in extreme summer heat.
Monsoon (June-September): High humidity (80-90% RH) makes mold management essential. Use continuous airflow (fan on whenever trays are uncovered), space trays widely, and bottom-water only. Germination is fast in the warmth and humidity, but post-germination mold on the soil surface is the main challenge. A pinch of food-grade cinnamon powder sprinkled on the soil surface has mild antifungal properties and can help manage surface mold in high-humidity conditions.
12 Ways to Use Coriander Microgreens in Indian Cooking
Coriander microgreens are the Indian microgreen with the widest natural integration into daily cooking — because dhania is already used as a garnish on nearly every Indian dish:
1. Standard Garnish Replacement: Wherever a recipe calls for "garnish with fresh coriander leaves," use coriander microgreens instead. The flavour is similar but more concentrated — use two-thirds the quantity for the same flavour impact.
2. Dal Tadka Finish: Scatter generously over any dal after pouring the tadka (tempered oil). The heat of the dal barely wilts the microgreens, creating a perfect contrast of cooked dal and fresh living herb.
3. Chaat Topping: The citrus-herbal punch of coriander microgreens elevates any chaat — pani puri, bhel puri, papdi chaat, or sev puri. Use alongside green chutney, not as a substitute for it.
4. Fresh Green Chutney Base: Blend coriander microgreens (30-40 g) with standard green chutney ingredients — mint leaves, green chillies, ginger, garlic, lime juice, salt. The microgreens add a more complex flavour than mature coriander alone, with the warm essential-oil note of the seeds coming through in the background.
5. Raita Stir-In: Mix 15-20 g of scissor-cut coriander microgreens into plain curd raita with cumin powder. Serve with biryani or paratha. The flavour is more assertive than using mature coriander leaves.
6. Poha and Upma Finish: Stir 20-25 g of coriander microgreens into freshly cooked poha or upma immediately before serving. The mild heat wilts the microgreens slightly but preserves their colour and character.
7. Egg Bhurji and Omelette: Add 20 g of coriander microgreens to egg dishes after removing from heat. The eggs carry the fresh herb flavour beautifully.
8. Biryani and Pulao Garnish: Scatter over the top of the serving dish as a final garnish. The contrast between the golden rice and vivid green microgreens is visually appealing, and the fresh herb note cuts through the rich spices.
9. Smoothies and Juices (Small Amounts): A small handful (15-20 g) of coriander microgreens in a green smoothie with cucumber, apple, ginger, and coconut water provides a refreshing herbal note. Coriander is divisive in smoothies — add gradually until you find your tolerance level.
10. Roti and Paratha Filling: Finely chop coriander microgreens and add to aloo paratha or methi paratha filling. Mix into the dough directly for coriander-flavoured rotis without needing dried herb.
11. Curry Finish: Most Indian curries are garnished with coriander. Using microgreens gives a more aromatic, visually vibrant garnish than mature bunch coriander, particularly because the microgreens' essential oil content is higher.
12. Cold Rice Dishes: Curd rice, lemon rice, and tamarind rice all benefit from a handful of coriander microgreens scattered just before serving. The herb's brightness balances the acidity of these dishes.
Where to Buy Coriander Seeds for Microgreens
Buying the right seeds is more important for coriander than for most other microgreens, because the risk of irradiated or treated seeds is higher:
What to look for:
- "Untreated," "food-grade," or "certified organic" on the label
- Stated germination rate of 75% or higher (coriander inherently has lower germination rates than brassicas)
- Harvest date within the past 12-18 months
- Whole, round seeds (not split or powdered) in resealable packaging
What to avoid:
- Grocery store dhania or spice shop coriander powder (obviously) — but also whole coriander seeds from spice shops unless you can verify they are not irradiated
- Garden planting seeds treated with fungicides
- Old stock without stated harvest dates
Testing germination before a full tray: Place 20 seeds on a damp paper towel, fold, and leave in a warm spot for 5 days. Count how many germinate. If fewer than 14 out of 20 (70%), do not use this batch for a full tray.
For reliable, high-germination coriander microgreen seeds, browse SAGreens seed range — all verified food-grade and tested for germination viability. For your complete home growing setup, visit our comprehensive microgreens growing guide. If you are growing in Pune and want to understand the seasonal adjustments for our local climate, our monsoon microgreens guide and top microgreens for Pune weather posts cover everything you need. And if you would prefer ready-to-eat coriander microgreens while you master the growing process, contact SAGreens — we deliver fresh across Pune, same-day.
Seed Quality & Pricing: All SAGreens microgreen seeds are NPOP-certified organic — untreated, non-GMO, germination tested before dispatch. Seeds start at ₹50/100g (wheatgrass), ₹124/100g (sunflower, mustard) and ₹120/100g (radish). Delivery charged at checkout, by city and weight. Browse microgreen seeds or contact us for bulk pricing.
Frequently Asked Questions: Coriander Microgreens
Why are my coriander seeds not germinating after 4 days?
The most common causes: seeds not soaked long enough (need 8-12 hours), irradiated or old seeds with low viability, temperature below 18 degrees Celsius during germination, or cocopeat that is too dry or too wet. Test germination on 10 seeds in a damp cloth first. If fewer than 7 germinate in 5 days, your seed batch is unsuitable.
Can I use the coriander seeds from my kitchen (spice rack)?
Sometimes, but unreliably. Whole coriander seeds from kitchen spice use are often irradiated to extend shelf life and prevent sprouting. If you want to test: soak 10 seeds in water for 12 hours, then place on a damp paper towel in a warm spot for 4 days. If 7 or more germinate, the seeds are viable. If fewer germinate, buy microgreen-grade seeds.
Why do my coriander microgreens taste soapy?
The soapy taste in coriander (a phenomenon experienced by approximately 10-15% of people due to a gene variant affecting aldehyde perception) affects coriander microgreens in the same way as mature coriander leaves. The microgreens have a more concentrated version of the same volatile compounds, so people who dislike coriander will likely dislike the microgreens as well. If you are one of the majority who loves the flavour, coriander microgreens will taste like a more intense version of the herb.
How do coriander microgreens compare in flavour to mature dhania?
Coriander microgreens have a similar base flavour profile to mature coriander leaves but with two notable differences: a slightly more intense, concentrated aroma (higher essential oil content per gram), and a warmer, almost spicy undertone from the seed's volatile compounds that is absent in the mature plant's leaves. Most people who love coriander find the microgreen version superior to the mature herb for garnishing applications.
My coriander microgreens developed white mold at the base. What do I do?
Surface mold is more common in coriander than in radish or broccoli because coriander seeds are sown more densely and germinate more slowly, giving mold more time to establish. If mold affects less than 25% of the tray surface: increase fan speed, stop watering for 48 hours, and harvest the healthy sections immediately. If mold is widespread, the batch is likely lost. For future trays: increase seed spacing, ensure continuous airflow from Day 3 onward, and switch to strict bottom watering.
Can I grow coriander microgreens without cocopeat?
Yes. Coriander microgreens can be grown on wet jute cloth, thick cotton cloth, or multiple layers of damp paper towel. The yield is slightly lower and the growing medium dries faster, requiring more frequent moisture checks, but these methods work well for a single small tray when you do not have cocopeat available. The jute-cloth method is particularly popular in South India.
Can I use coriander seeds from my kitchen for microgreens?
Sometimes, but unreliably. Whole coriander seeds from kitchen spice use are often irradiated to extend shelf life. Test: soak 10 seeds for 12 hours then place on a damp paper towel in a warm spot for 4 days. If 7 or more germinate, the seeds are viable. If fewer, buy microgreen-grade seeds.
How long does it take to grow coriander microgreens?
Coriander microgreens take 12-16 days from sowing to harvest — longer than most other varieties. Germination takes 3-5 days (versus 1-2 days for radish), and post-germination growth is slightly slower. The harvest is intensely aromatic with more complex flavour than mature coriander leaves.
Why do coriander seeds need soaking before growing microgreens?
Coriander seeds are actually double seeds — two seeds joined in one round husk. The thick outer husk requires 8-12 hours of soaking to hydrate adequately before germination can begin uniformly. Without soaking, germination is slow and erratic.
Conclusion: The Indian Microgreen Worth Mastering
Coriander microgreens require more patience and attention at the seed preparation stage than most beginners expect. But once you understand the pre-soaking requirement and the slower germination timeline, they are a deeply rewarding variety to grow — because the result is a microgreen that integrates perfectly into every meal of the Indian day, from morning poha to evening dal, from chaat to biryani. The familiar dhania flavour, intensified and alive, landing on every dish you already love.
For fresh, ready-to-eat coriander and other microgreens delivered across Pune, browse the SAGreens range. To understand more about the nutritional power of microgreens compared to mature vegetables, read our microgreens nutritional powerhouse guide. For more growing guides, explore our posts on growing mustard microgreens and growing methi microgreens — two other Indian classics that share coriander's cultural familiarity. Contact the SAGreens team if you have questions — we grow coriander microgreens through every Pune season and are happy to share what we have learned.
What do microgreen seeds cost to buy in India?
Fresh microgreens from SAGreens come in 50g punnets: sunflower ₹100, mustard ₹100, fenugreek ₹120, radish ₹150, broccoli ₹200. Seed is sold separately, and each 100g seed packet grows 2–4 standard trays at home. Browse all seed varieties or WhatsApp SAGreens for bulk pricing and growing advice.
The Patience Payoff: Coriander microgreens take 12-16 days — longer than any other common variety. But the result is a microgreen that integrates into Indian cooking more naturally than any other: the familiar dhania flavour, intensified and alive, landing on dal, chaat, biryani, and raita alike. The extra days are worth the wait.
*This guide is written by the SAGreens team — Ajay Toradmal and a three-generation farming family in Pune, Maharashtra, with decades of hands-on experience growing microgreens and food crops organically.*
Related Reading
More Microgreens Tips & Recipes
Microgreens in Indian Cuisine: Nutritional Boost
Discover how locally grown microgreens can elevate traditional Indian recipes with better nutrition, flavor and easy Pune home cooking.
Mustard Microgreens: How to Grow and Use Them at Home
Grow mustard microgreens in 7-10 days from seed. Sowing rate, no soaking, harvest timing, how hot they taste, and how to use them in Indian cooking.
How to Grow Red Amaranth Microgreens in 7-16 Days
Grow red amaranth microgreens at home in 7 to 16 days. Iron and vitamin C, vivid magenta stems, and how to use them in salads and Indian dishes.
Fresh Tips & Exclusive Offers
Subscribe for growing tips, seasonal updates, and exclusive offers on fresh organic microgreens in Pune.