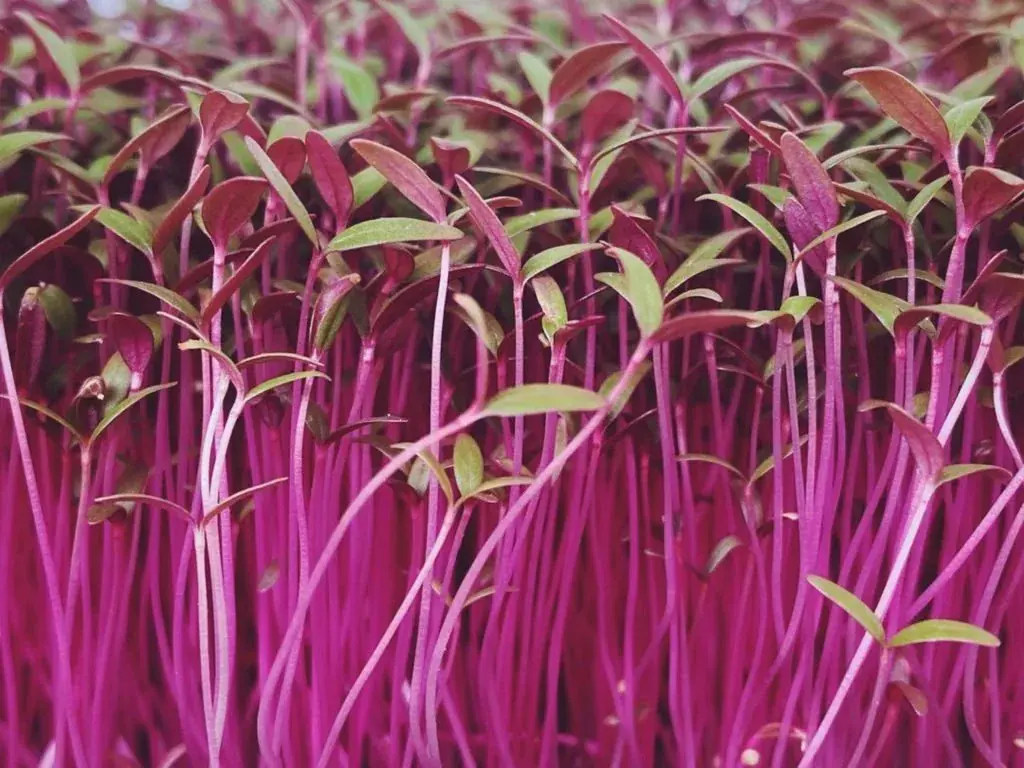
Methi (Fenugreek) microgreens are among the fastest-growing and most nutritious microgreens you can grow at home. Rich in iron, fiber, antioxidants, and vitamins A, C, and K, methi microgreens have a slightly bitter, earthy taste that pairs perfectly with Indian dishes.
As a microgreen expert, I can confidently say: methi is ideal for beginners and gives excellent yield with minimal effort.
Key Takeaways: Methi (fenugreek) microgreens take 7–10 days and benefit from 6–8 hours pre-soaking before sowing. Flavour is mildly bitter — characteristic of methi leaves but gentler. Rich in iron, magnesium, B vitamins, and 4-hydroxyisoleucine (insulin sensitiser). Use as a garnish on dal, blend into thepla dough, or add to upma. Regular kitchen fenugreek seeds work well for growing.
Why Choose Methi Microgreens?
- Ready to harvest in 8–10 days
- Requires low maintenance
- Grows well in Indian climate — suited to Pune’s year-round temperatures
- Excellent for daily home consumption
- High market demand for home kitchens and cloud kitchens
What You’ll Need
- Methi seeds (good quality, untreated)
- Growing tray (with or without holes)
- Cocopeat or potting soil
- Spray bottle
- Clean water
- Indirect sunlight
Step-by-Step Guide to Growing Methi Microgreens at Home
Step 1: Seed Preparation (Very Important)
Methi seeds have a hard outer coat, so soaking is essential. Wash seeds thoroughly, soak in water for 8–10 hours, then drain and keep in a cloth for another 6–8 hours (optional but improves germination).
This step ensures faster and uniform growth.
Step 2: Prepare the Growing Tray
Fill the tray with a 2–3 cm layer of cocopeat, level the surface gently, and lightly moisten (do not overwater).
Tip: Cocopeat works better than soil for methi microgreens because it prevents fungal issues.
Step 3: Sowing the Seeds
Spread soaked seeds evenly (not overcrowded), press lightly into the medium, do not cover with soil, and spray water gently.
Step 4: Blackout Period (Key for Fast Growth)
Cover the tray with another tray or lid and keep in a dark place for 2–3 days, spraying once daily. This promotes faster germination, stronger stems, and uniform growth.
Step 5: Sunlight and Watering
After 2–3 days, remove the cover and place the tray in bright indirect sunlight. Avoid harsh afternoon sun (especially important in Pune summers). Spray water once or twice daily.
Overwatering is the #1 mistake — keep it moist, not wet.
Step 6: Harvesting on Day 8–10
Harvest when microgreens are 6–8 cm tall. Use clean scissors and cut just above the growing medium. Fresh methi microgreens have maximum nutrition when harvested young.
Common Problems and Solutions
- Yellow leaves — Cause: Low sunlight. Solution: Move to a brighter area or use a grow light.
- Fungal growth — Cause: Excess moisture. Solution: Reduce watering, improve airflow.
- Bitter taste — Natural for methi. Best used fresh and young.
How to Use Methi Microgreens in Indian Cooking
- Sprinkle on dal, sabzi, poha, upma
- Add to paratha dough for flavour and nutrition
- Use in salads and smoothies
- Garnish curries and rice dishes for extra nutrition
Nutritional Benefits of Methi Microgreens
- Boosts digestion and gut health
- Helps regulate blood sugar levels — see our complete fenugreek microgreens benefits guide for detailed research
- Improves immunity with vitamins A, C, and K
- Great for iron deficiency — ideal for Indian diets
- Supports weight management with high fibre content
Final Expert Tips for Growing Methi in Pune
- Always use fresh, untreated seeds
- Avoid overcrowding to prevent mould
- Harvest early for best taste
- Grow a new tray weekly for a continuous supply — easy in Pune’s climate year-round
Buy fenugreek microgreens or organic seeds from SAGreens for delivery across Pune. Read more growing guides or contact us for bulk orders.
Why Methi Microgreens Are the Most Indian Microgreen
Of all the microgreen varieties that can be grown at home, fenugreek — or methi — holds a unique place in Indian kitchens. Methi is already embedded in Indian cooking culture in every form: fresh methi leaves (saag methi), dried kasuri methi, methi seeds as a spice, methi paratha, methi dal, methi thepla. The flavour is part of how we think about Indian cooking.
Growing methi as a microgreen brings this beloved flavour into an entirely new format — more concentrated, more nutritious, available in days rather than weeks, and fresh from your own home. When you sprinkle methi microgreens onto your morning upma or blend a handful into a smoothie, you are connecting a thousand-year-old Indian crop tradition with modern nutritional science.
Unlike varieties like sunflower or pea shoots — which are wonderful but feel somewhat "imported" in an Indian kitchen context — methi microgreens feel instantly familiar. Any Indian cook who has used fresh methi leaves will immediately know what to do with methi microgreens. This familiarity makes methi the perfect entry point for anyone new to microgreen growing.
SAGreens' fenugreek microgreens are available fresh for delivery across Pune, but growing your own is even more rewarding. Here is everything you need to know.
Pre-Soak Guide: Why 6–8 Hours Makes All the Difference
Fenugreek seeds have a hard, dense outer coat (called a testa) that slows water absorption. Unlike soft seeds such as radish or mustard — which can be sown directly — methi seeds need pre-soaking to germinate reliably and quickly.
What to do:
- Measure your seeds (about 15–20g for a 25x35cm tray — do not over-seed as it causes crowding and mould).
- Rinse under running water to remove dust.
- Place in a clean bowl and cover with 3–4x their volume in clean water.
- Soak for 6–8 hours at room temperature.
What happens during soaking:
During the first hour, the seeds absorb water rapidly and begin to swell. The hard outer coat softens and becomes slightly sticky — this is normal and characteristic of methi seeds. By hour four, the seeds have roughly doubled in volume and the embryo inside has begun to activate. By hour eight, you may even see tiny radicle (root) tips emerging, which is a sign of vigorous germination.
Why soaking reduces bitterness:
Fenugreek's bitterness comes partly from compounds including saponins and alkaloids concentrated in the outer seed coat. Soaking helps leach some of these compounds out of the seed into the water, which you discard before sowing. This is why microgreen methi tastes noticeably milder than eating a raw fenugreek seed. Extended soaking (up to 12 hours) reduces bitterness further, but beyond 12 hours seeds can become waterlogged and prone to rot.
After soaking, drain thoroughly and spread seeds on a clean cloth or mesh for 30 minutes to remove surface moisture before sowing.
Day-by-Day Growing Guide: Day 0 to Day 10
Day 0 — Sowing
After draining your soaked seeds, spread them evenly across your prepared cocopeat tray. Aim for a single layer where seeds touch but do not pile up. Press lightly with your palm so seeds make good contact with the moist medium. Mist gently with your spray bottle. Cover the tray with another tray placed upside down on top (no weight needed).
Day 1 — First Signs
Seeds are absorbing moisture and activating. Do not open the cover unless checking. The tray should feel slightly warm underneath — that is metabolic heat from germination, a good sign. If you do check, mist lightly if the top seeds look dry.
Day 2 — Germination Underway
Open the cover briefly to check. You should see white radicles (root tips) emerging from most seeds. The seed coat may be shedding — this is normal. The seeds may still look pale and compact. Mist once, replace the cover, and return to darkness.
Day 3 — Shoots Emerging
Most seeds should now show shoots reaching upward. The stems are still pale yellow-white from lack of light — this is expected. Mist once. If shoots are pressing against the cover tray, you may need to prop it up slightly with toothpicks or a folded cloth. Keep in darkness.
Day 4 — End of Blackout Phase
This is typically the last day of the blackout phase for methi. Shoots should be 2–4 cm tall, pale yellow-white, and densely packed. Remove the cover. If the cocopeat feels dry on top, mist before removing. From this point, the tray moves to your light position.
Day 5 — Greening Begins
Within 6–8 hours of light exposure, the pale shoots begin to green. Chlorophyll production activates rapidly. By the end of day 5, you should see distinctly greener stems and the first hint of cotyledon (seed leaf) colour. Water by bottom-watering if possible — pour water into a tray below and let the cocopeat absorb from underneath. This keeps stems dry and reduces mould risk.
Day 6 — Cotyledons Opening
The distinctive methi cotyledons — round, slightly cupped leaves — begin to unfurl. The plant is now photosynthesising actively. Colour deepens. You should be misting or bottom-watering once daily. The aroma of fresh methi becomes noticeable when you lean close to the tray.
Day 7 to 8 — Rapid Growth
The microgreens grow noticeably from day to day now. Cotyledons are fully open or opening. Stem height reaches 5–7cm. The methi flavour is developing — try a small leaf to taste. Some growers prefer to harvest here for maximum tenderness and lower bitterness.
Day 9 — Harvest Window Opens
This is the earliest recommended harvest day for full cotyledon development. The microgreens should be 6–8cm tall with fully open cotyledons and a deep green colour. Taste a few — if the flavour is pleasant and not excessively bitter, harvest today.
Day 10 — Full Harvest
By day 10, the microgreens are at peak development for standard harvest. True leaves (the second set, different in shape from cotyledons) may just be beginning to emerge on some plants. Harvest before true leaves develop significantly, as the plant redirects energy into stem elongation and flavour becomes more bitter.
To harvest: Use clean scissors or a sharp knife. Hold a small bunch of stems and cut about 1cm above the cocopeat surface. Cut the whole tray in sections. Do not wash until ready to use. Lay cut microgreens loosely in a container lined with a dry paper towel, seal, and refrigerate.
Cocopeat Preparation for Methi: Getting the Moisture Right
The growing medium plays a significant role in methi microgreen success. Cocopeat (compressed coconut fibre) is the best choice for home growing because it retains moisture evenly, is sterile, and does not compact like soil.
Preparing cocopeat from a brick:
- Break off a chunk from a cocopeat brick (roughly 300–400g for one tray).
- Place in a large bowl and add warm water slowly — about 3 litres per 650g brick.
- Break up the cocopeat as it absorbs water. It should expand significantly.
- Test moisture: squeeze a handful. It should hold its shape briefly then crumble. No water should drip. If water drips, it is too wet — spread on a tray to dry for 30 minutes.
- Fill your growing tray to a depth of 2–3 cm. Level the surface gently.
For methi specifically: The cocopeat should be on the drier side of moist. Methi seeds are already sticky after soaking and do not need a very wet medium. Over-wet medium increases the chance of fungal issues during the blackout period.
The Blackout Phase for Methi: What to Expect
The 3–4 day blackout phase serves several important functions for methi:
- Etiolation (the light-deprivation response) causes stems to grow tall rapidly as the plant "reaches" for light, creating longer, more usable stems.
- Darkness maintains moisture in the covered environment, helping even germination.
- Warmth from the germinating seeds and covered environment speeds growth.
What to look for: Check once daily by lifting the cover for 30 seconds. You should see uniform upward growth. If you see mould (white fuzzy growth, not to be confused with white root hairs which look thread-like and fine), increase ventilation and reduce moisture. Mould in the blackout phase usually means the cocopeat was too wet or the tray was in an area without any air movement.
Pune-specific tip: During monsoon season (June–September), shorten the blackout period to 2–3 days and check more frequently. The high ambient humidity means less ventilation during blackout, which raises mould risk.
Light Phase: Colour Development and Care
Once methi microgreens are moved to light, their colour transformation happens quickly. Here is what to observe:
- 4–8 hours: Slight yellowing gives way to the first green tinge.
- 24 hours: Distinctly green. Cotyledons beginning to open.
- 48 hours: Deep green, cotyledons mostly open.
How much light methi needs: Indirect bright light (like an east-facing window) is ideal. Methi does not require intense direct sun — 4–6 hours of bright indirect light is sufficient. Direct harsh midday sun can scorch cotyledons, especially in Pune's summer months.
Colour as a quality indicator: Deep green, uniform colour across the tray means adequate light and even moisture. Pale yellow cotyledons mean insufficient light (move the tray or supplement with a grow light). Brown tips mean the microgreens are being overwatered or are past their ideal harvest point.
Harvesting Methi Microgreens: Timing, Technique, and Yield
When to cut: The ideal harvest moment for methi is when cotyledons are fully open and deep green, and before true leaves emerge (which takes the plant into a more bitter, fibrous stage). This is typically day 8–10.
Taste-test rule: The best harvest timing varies tray to tray depending on your home temperature and light. Rather than going purely by day count, taste a cotyledon. If it is pleasantly bitter-sweet with the characteristic methi flavour, harvest. If it is very sharp or too bitter, try harvesting one day earlier next time.
Harvest technique:
- Water the tray the morning before harvesting (bottom-water). The added moisture helps cut stems stay fresh longer.
- Use clean scissors — kitchen scissors or herb scissors both work.
- Cut in small bunches, holding stems together and cutting 1cm above the cocopeat.
- Do not wash immediately — moisture shortens shelf life. Store dry.
Expected yield: A 25x35cm tray with 15–20g of seeds yields approximately 80–120g of fresh methi microgreens after harvest. Yield varies with seed density, growing medium moisture, and light exposure.
Managing Bitterness in Methi Microgreens
Methi's characteristic bitterness is part of its identity — and its health value (the bitter compounds have digestive and blood-sugar regulatory effects). However, if you find the bitterness too strong, here are ways to manage it:
- Extend pre-soaking: Soak up to 10–12 hours instead of 6–8. More soaking time = more bitter compounds leached out before sowing.
- Harvest earlier: Day 7–8 microgreens are noticeably milder than day 10. Early harvest captures maximum sweetness before bitterness develops.
- Blanching: Briefly dip harvested microgreens in boiling water for 5–10 seconds, then into ice water. This destroys some bitter compounds while preserving the colour and most nutrients. Use blanched methi in cooking rather than raw.
- Pairing: Mix methi microgreens with milder varieties (sunflower, pea shoots) in a blend. The other microgreens balance the bitter notes.
- Dairy pairing: The fat in yoghurt, paneer, or buttermilk coats the tongue and significantly reduces the perception of bitterness. This is why methi and raita work so well together.
Nutritional Profile of Methi Microgreens
Fenugreek microgreens are nutritionally remarkable, with research documenting several key compounds:
Iron: Methi is one of the highest plant-based iron sources available. 50g of methi microgreens can contribute significantly to daily iron requirements — important for Indian diets where plant-based iron absorption is a common concern.
4-hydroxyisoleucine: This unusual amino acid, found primarily in fenugreek, has been studied for its ability to stimulate insulin secretion and improve insulin sensitivity. Research suggests it acts on pancreatic beta cells to increase glucose uptake. This makes methi microgreens particularly valuable for people managing blood sugar or at risk of type 2 diabetes.
Magnesium: Supports over 300 enzymatic processes in the body. Methi is a good source. Magnesium deficiency is common in urban Indian populations with highly processed diets.
B Vitamins: Including B6, B9 (folate), and B12 precursors. Critical for energy metabolism, nerve function, and — for folate specifically — foetal development.
Vitamin K: Important for blood clotting and bone health. Note: those on blood-thinning medications should maintain consistent (not dramatically increased) intake of vitamin K-rich foods and consult their doctor.
Fibre: Both soluble and insoluble fibre are present, supporting digestive health and contributing to the blood-sugar regulating effect.
Explore our full guide to microgreens in Indian cuisine for recipes that make the most of methi microgreens' nutritional profile.
10 Indian Recipes Using Methi Microgreens
1. Methi Microgreen Dal Tadka
Add a handful of methi microgreens to your finished dal tadka just before serving. The residual heat wilts them slightly while preserving nutrients. The bitterness complements the earthiness of tuvar dal perfectly.
2. Methi Thepla with Microgreens
Mix methi microgreens directly into your thepla dough (wheat flour, yoghurt, ajwain, turmeric). Use 50g of microgreens per cup of flour. The microgreens add intense methi flavour without the chewiness of larger leaves.
3. Methi Microgreen Paratha
Chop methi microgreens finely and mix into your paratha stuffing (mashed potato or paneer base). A generous handful per serving adds a clean, fresh bitterness that balances rich stuffings beautifully.
4. Methi Upma Garnish
Finish your upma with a generous handful of raw methi microgreens stirred in at the end (off heat). The warmth of the upma slightly wilts the microgreens without fully cooking them, preserving nutrition.
5. Poha with Methi Microgreens
After finishing your poha, scatter raw methi microgreens on top with the usual garnish of coriander and lemon. They add a contrasting bitter freshness to the mildly sweet poha.
6. Methi Microgreen Smoothie
Blend 30g methi microgreens with banana, apple, ginger, and coconut water for a nutritious morning smoothie. The banana and apple sweetness masks the bitterness completely. Add a pinch of turmeric for additional anti-inflammatory benefit.
7. Methi Raita
Chop methi microgreens finely and stir into beaten yoghurt with salt, roasted jeera powder, and a pinch of kala namak. Serve with biryani, pulao, or as a side with roti.
8. Methi Microgreen Chutney
Blend methi microgreens with fresh coriander, green chilli, garlic, ginger, lemon juice, and salt. The resulting chutney is intensely flavoured and pairs brilliantly with idli, dosa, or sandwiches.
9. Methi Microgreen Sabzi Garnish
Any dry sabzi — aloo methi, baingan bharta, mixed vegetable — benefits from a handful of raw methi microgreens scattered on top just before serving. The raw bitterness cuts through the oil and spice beautifully.
10. Methi Microgreen Lassi
Blend methi microgreens into a savoury lassi with yoghurt, water, roasted jeera, black salt, and mint. A therapeutic drink, especially for people managing blood sugar.
Growing Methi Through Indian Seasons
Winter (Oct–Feb): Best season. Growth is reliable, germination is excellent, flavour is at its most balanced. Grow outdoors on a balcony or near any window.
Summer (Mar–May): Heat-tolerant compared to most microgreens but needs shade from harsh afternoon sun. Water twice daily. Harvest on day 7–8 before heat causes premature bitterness development. Consider growing in a cooler corner of the kitchen.
Monsoon (Jun–Sep): Most challenging. Reduce watering significantly (the humid air provides moisture). Increase ventilation during the blackout phase. Shorten blackout to 2–3 days. If mould appears, remove affected seeds immediately and do not over-correct by increasing ventilation so much that the medium dries out.
Using Grocery Fenugreek Seeds vs Dedicated Microgreen Seeds
One of the practical advantages of methi microgreens is that regular kitchen fenugreek seeds (methi dana, available at any Indian grocery) work perfectly well for growing. The seeds sold as cooking spice are the same species as dedicated microgreen seeds, just packaged differently.
However, there are differences to note:
| Feature | Kitchen Methi Seeds | Dedicated Microgreen Seeds |
|---|---|---|
| Price | ₹30–50 per 100g | ₹100–150 per 100g |
| Germination rate | 70–85% | 85–95% |
| Chemical treatment | Occasionally fumigated | Untreated, tested |
| Consistency | Variable by batch | Consistent |
| Availability | Any grocery store | Online, specialty stores |
For your first few grows, kitchen methi seeds are a great way to experiment at low cost. Once you are committed to regular growing, upgrading to dedicated seeds from a trusted source like SAGreens' fenugreek microgreens seed range or exploring the fenugreek microgreen seeds guide gives better consistency and guaranteed germination rates.
Common Problems and Solutions
Sticky seeds clumping during blackout:
This is normal for methi. The mucilage coating on fenugreek seeds is hydrophilic — it absorbs water and becomes sticky. It does not cause problems. As seeds germinate, they naturally separate as roots grow. Do not try to separate them manually.
Slow or uneven germination:
Usually caused by insufficient soaking, uneven moisture in the cocopeat, or seeds packed too densely. Ensure seeds are soaked for the full 6–8 hours, cocopeat is evenly moist (not wet), and seeds are spread in a single layer with minimal overlap.
Excessive bitterness at harvest:
Harvest earlier (day 7–8 instead of 10). Extend pre-soak time next batch to 10–12 hours. Try the blanching technique for immediate use in cooked dishes.
Mould on seeds or stems:
Reduce watering immediately — mould means too much moisture. Improve air circulation by propping the cover up slightly during blackout. In high-humidity conditions (monsoon in Pune), shorten the blackout to 2 days and move the tray to a spot with more air movement after opening.
Yellow cotyledons after moving to light:
Means insufficient light. Move to a brighter location or supplement with an LED grow light. Yellow that does not green up within 12 hours of better light indicates the tray was in darkness too long or the seeds were not viable.
For more detailed growing information and to explore other easy home varieties, see our comprehensive microgreens growing guide. To order fresh fenugreek microgreens for home delivery in Pune, or to get fenugreek microgreen seeds delivered to your door, contact SAGreens today.
Why Methi Microgreens Are the Most Indian Microgreen
Organic Certification: SAGreens supplies NPOP-certified organic microgreen seeds — untreated, non-GMO, tested at 85%+ germination rate. Available with pan-India delivery from our Pune farm.
Frequently Asked Questions: Fenugreek (Methi) Microgreens
Can I use the methi seeds from my kitchen spice rack?
Often yes — fenugreek seeds from a kirana store or kitchen spice supply are one of the more reliable kitchen-seed-to-microgreen candidates because they are rarely irradiated and turnover is high. However, always test germination first: place 10 seeds on a damp paper towel for 48 hours. If 7 or more sprout, use them. If the germination rate is below 70%, buy from a dedicated microgreen seed supplier for better results.
Why do my fenugreek microgreens taste very bitter?
Fenugreek microgreens naturally have a mild bitter note — this is characteristic of the plant and cannot be entirely eliminated. Bitterness is significantly reduced by harvesting before the first true leaves emerge (at the cotyledon stage, Days 10-14). Harvesting later, in heat, or from old seeds all increase bitterness. Pre-soaking seeds for 8-12 hours also slightly reduces the bitter compounds by initiating the germination cascade that begins metabolising saponins.
How much fenugreek microgreen should I eat daily for blood sugar benefits?
Clinical studies on fenugreek's blood sugar effects typically use 10-25 g of seeds daily. As microgreens (which are more concentrated than dried seeds per gram), a daily serve of 25-30 g provides a meaningful dose of galactomannan fibre and 4-hydroxyisoleucine. Add to one daily meal as a garnish — consistency over weeks is more important than the exact daily amount.
My methi seeds are not germinating uniformly. Half the tray is bare. What went wrong?
Uneven fenugreek germination is usually caused by: (1) uneven seed distribution — fenugreek seeds are round and roll to the edges of the tray; scatter slowly and deliberately rather than pouring from one spot; (2) insufficient initial moisture — the seed coat needs sustained contact with moisture; ensure cocopeat is well-moistened before sowing and seeds are pressed firmly in; (3) old or low-viability seeds — fenugreek seeds older than 18 months show significantly reduced germination rates.
How do fenugreek microgreens fit into a diabetic Indian diet?
Fenugreek microgreens combine the blood sugar benefits of fenugreek seeds with the living enzyme and vitamin content of fresh microgreens. The galactomannan fibre slows glucose absorption, and 4-hydroxyisoleucine directly stimulates insulin secretion. Add 20-30 g of methi microgreens as a garnish on the main meal (dal, sabzi, roti) for consistent post-meal glucose management. They work alongside (not instead of) prescribed diabetes medication — consult your doctor before making dietary changes for diabetes management.
Can I grow methi microgreens without sunlight?
Yes — methi microgreens grow well under artificial LED grow lights. A full-spectrum LED panel (24–36W) positioned 20–25 cm above the tray for 12–14 hours daily produces results equivalent to natural east-window light. This makes methi one of the most apartment-friendly varieties, ideal for Pune, Mumbai, or Delhi flats with limited natural light.
Do methi microgreens help with lactation for new mothers?
Fenugreek has a long tradition as a galactagogue (milk production booster) in Ayurvedic and traditional Indian medicine. While clinical evidence is mixed, methi microgreens are a gentler way to consume fenugreek regularly compared to raw seeds. Many new mothers in India consume methi in various forms for this purpose. Consult your doctor or a lactation specialist before using for this specific benefit.
How do I store methi microgreens after harvest to keep them fresh longer?
Harvest dry — do not water the tray the night before. After cutting, let the microgreens air-dry on a paper towel for 15–20 minutes. Place loosely in an airtight container lined with a dry paper towel to absorb excess moisture. Refrigerate at 4–7°C. Properly stored, methi microgreens last 5–7 days. Do not wash before storing — rinse only just before use.
What is the ideal temperature for growing methi microgreens at home in India?
Fenugreek microgreens thrive between 20–28°C — the typical indoor temperature in most Indian homes year-round. Germination is fastest at 24–26°C. Below 18°C, germination slows significantly. Above 32°C, rapid growth increases bitterness and mold risk. Pune, Bangalore, and most hill stations naturally provide good growing temperatures in their cooler months. In Delhi or Nagpur summers, grow in an air-conditioned room during May and June.
How do methi microgreens compare to mature methi leaves (saag methi) nutritionally?
Methi microgreens contain significantly higher concentrations of most vitamins compared to mature methi leaves. Research shows microgreens can have 4–40x more nutrients per gram than the mature plant. Vitamin C and iron are particularly concentrated at the seedling stage. However, mature methi leaves have higher fibre content. The practical advantage of microgreens is density — a 30g serving of microgreens delivers the nutrition of a much larger quantity of mature leaves.
Can children eat methi microgreens?
Yes — methi microgreens are safe for children above 6 months (introduced appropriately). The bitterness may need masking for younger children; blend into smoothies with banana, add to paratha dough (the bitterness disappears in cooking), or mix into mild dal. For children managing specific conditions like anaemia (common in India), the iron content is particularly beneficial. Start with small quantities to test tolerance.
The Blood Sugar Benefit: Research shows fenugreek's galactomannan fibre and 4-hydroxyisoleucine amino acid work synergistically to slow glucose absorption and improve insulin sensitivity. A daily serve of 25-30 g of fresh methi microgreens on your main meal provides a meaningful functional dose — without any supplement capsule or powder.
*This guide is written by the SAGreens team — Ajay Toradmal and a three-generation farming family in Pune, Maharashtra, with decades of hands-on experience growing microgreens and food crops organically.*
Pune Delivery: Fresh fenugreek microgreens are available from SAGreens — farm-harvested and delivered same-day across Pune. Or contact us for a growing kit to start your own methi microgreen tray at home.
How long do methi microgreens take to grow?
Methi microgreens take 7–10 days from sowing to harvest. They benefit from 6–8 hours of pre-soaking before sowing to speed up and improve germination rates.
Are methi microgreens bitter?
Yes, methi microgreens have a characteristic bitter taste — the same bitterness found in mature methi leaves, but milder. The bitterness can be balanced by pairing with sweeter or milder ingredients such as yogurt, tomato, or mild greens.
What are the health benefits of methi microgreens?
Methi microgreens are rich in iron, magnesium, B vitamins, and 4-hydroxyisoleucine — a compound shown to improve insulin sensitivity and lower blood sugar. They are particularly valued for diabetes management, digestive health, and as a galactagogue for lactating mothers.
Can I use regular kitchen methi seeds to grow microgreens?
Yes. Regular fenugreek seeds from Indian spice shops work well for microgreens, provided they are not roasted or chemically treated. For the most consistent germination, source seeds specifically intended for sprouting or microgreens from a supplier like SAGreens.
How do I use methi microgreens in Indian cooking?
Add raw methi microgreens to dal as a finishing garnish, blend into thepla dough, use as a topping for upma or poha, mix into raita, or garnish any curry. Methi microgreens substitute well for kasuri methi in most applications while adding fresh nutrition.
Are methi microgreens better than kasuri methi?
Methi microgreens provide fresh vitamins (C, B vitamins, iron) that dried kasuri methi loses in processing. Kasuri methi has a more concentrated, intense flavour ideal for cooking. Use microgreens for fresh nutritious garnishing; kasuri methi for concentrated flavour in cooked dishes.
How do I store methi microgreens after harvest?
Harvest dry — do not water the night before. Let cut microgreens air-dry on a paper towel for 15–20 minutes. Store loosely in an airtight container lined with a dry paper towel. Refrigerate at 4–7°C and consume within 5–7 days. Rinse only just before use.
Related Reading
More Microgreens Tips & Recipes
Kohlrabi Microgreens (Khol Khol): Benefits and Growing
What kohlrabi microgreens contain, how to grow them in 8 to 12 days, and the questions people actually ask — pregnancy, hair, and how they differ from broccoli.
Fenugreek (Methi) Microgreens: Benefits and Growing Guide
Fenugreek microgreens, or methi, ready in 8 to 12 days with no soaking. What they contain, why the bitterness develops, and how to use them in Indian cooking.
Fresh Tips & Exclusive Offers
Subscribe for growing tips, seasonal updates, and exclusive offers on fresh organic microgreens in Pune.